Introduction
CyberArk is a password vault tool. The integration with CyberArk retrieves passwords or credentials to implement discovery and launch remote consoles.
Step 1: Configure the integration
- From All Clients, select a client.
- Navigate to Setup > Account.
- Select the Integrations and Apps tile.
- The Installed Integrations page, where all the installed applications are displayed. Note: If there are no installed applications, it will navigate to the Available Integrations and Apps page.
- Click + ADD on the Installed Integrations page. The Available Integrations and Apps page displays all the available applications along with the newly created application with the version.
- Search for CyberArk using the search option available.
Alternatively, use the All Categories option to search. - Click Add on the CyberArk tile.
On the Configuration page, add credential mappings. - Click +Add in the Credential Mappings section.
- Enter the following information in the Create Credential Mapping window:
- Name: Specify the password vault.
- Type: Select Type from the dropdown. Based on the Type selected, the values in the Key and Value fields under Credential Mappings appear.
- Enter the values for the respective keys:
- AppID: Displays the unique ID of the application issuing the password request.
- UserName: Displays the UserName property of the password.
- Address: Displays the Address property of the password.
- PolicyID: Unique ID of the policy.
- Safe: Name of the Safe where the password is stored. You can add, edit or delete the values accordingly.
- Click Add. The configuration is created.
- Click the three dots icon to Edit, Save As, and remove the password vaults respectively.
- Click +Add to create credential mappings.
- Click Done.
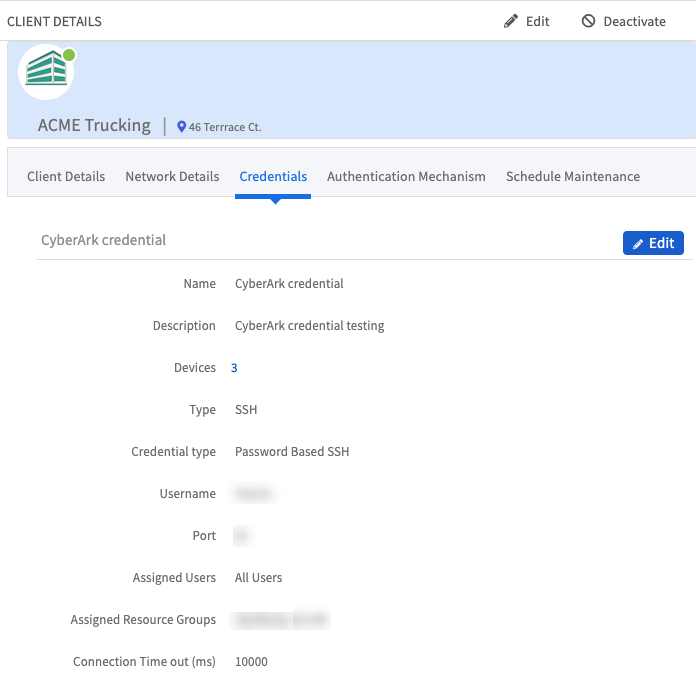
Step 2: Create a credential
Navigate to Setup > Accounts > Clients and select the client for CyberArk credential assignment.
From the Credentials tab, click Add, and enter:
- Name
- Description
- Type: Select
SSHfrom the drop-down menu.- Authentication type: Enter either
PasswordorKey Pair. Key Pair - Username
- Use Password Vault
- Integration: Pre-populated with
CyberArk. - Policy Mapping: Pre-populated with your configured integration name.
- Port:
- Authentication type: Enter either
- Connection Time-out (ms):
Click Next to assign resources.
Click Save.
Actions on Integration
You can perform actions on an integration.
- See here for more information.