Introduction
ManageEngine ServiceDesk Plus is a web-based, IT help desk software with integrated asset and project management built on an ITIL framework.
This document describes the ManageEngine ServiceDesk Plus On-Premise deployment.
OpsRamp supports bidirectional (outbound and inbound) integration.
OpsRamp Configuration
Install the Integration
- From All Clients, select a client.
- Go to Setup > Account.
- Select the Integrations and Apps tab.
- The Installed Integrations page, where all the installed applications are displayed. Note: If there are no installed applications, it will navigate to the Available Integrations and Apps page.
- Click + ADD on the Installed Integrations page. The Available Integrations and Apps page displays all the available applications along with the newly created application with the version.
- Search for ManageEngine ServiceDesk Plus using the search option available.
Note: Alternatively, you can use the All Categories option to search. - Click ADD on the ManageEngine ServiceDesk Plus tile. The Inbound tab is displayed.
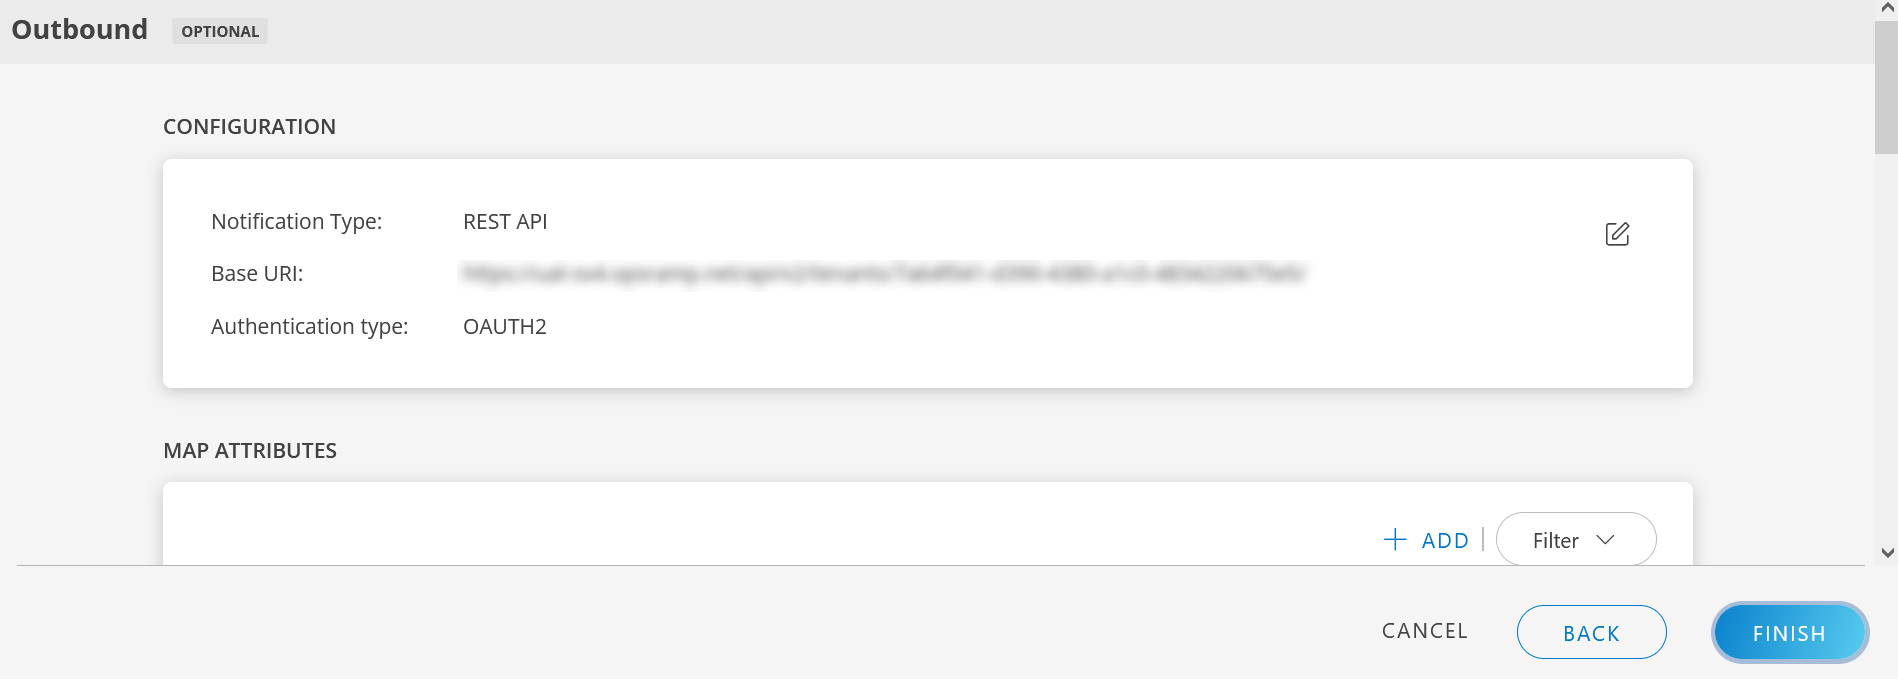
Configure Outbound Integration
Follow these steps to configure Outbound integration:
Configure the Outbound (From OpsRamp to ManageEngine ServiceDesk Plus)
Click here to fetch the Key and Secret of ManageEngine Service Desk Plus Cloud.
Follow these steps to configure outbound integration:
Click Add in the CONFIGURATION section. The ADD CONFIGURATION screen is displayed.
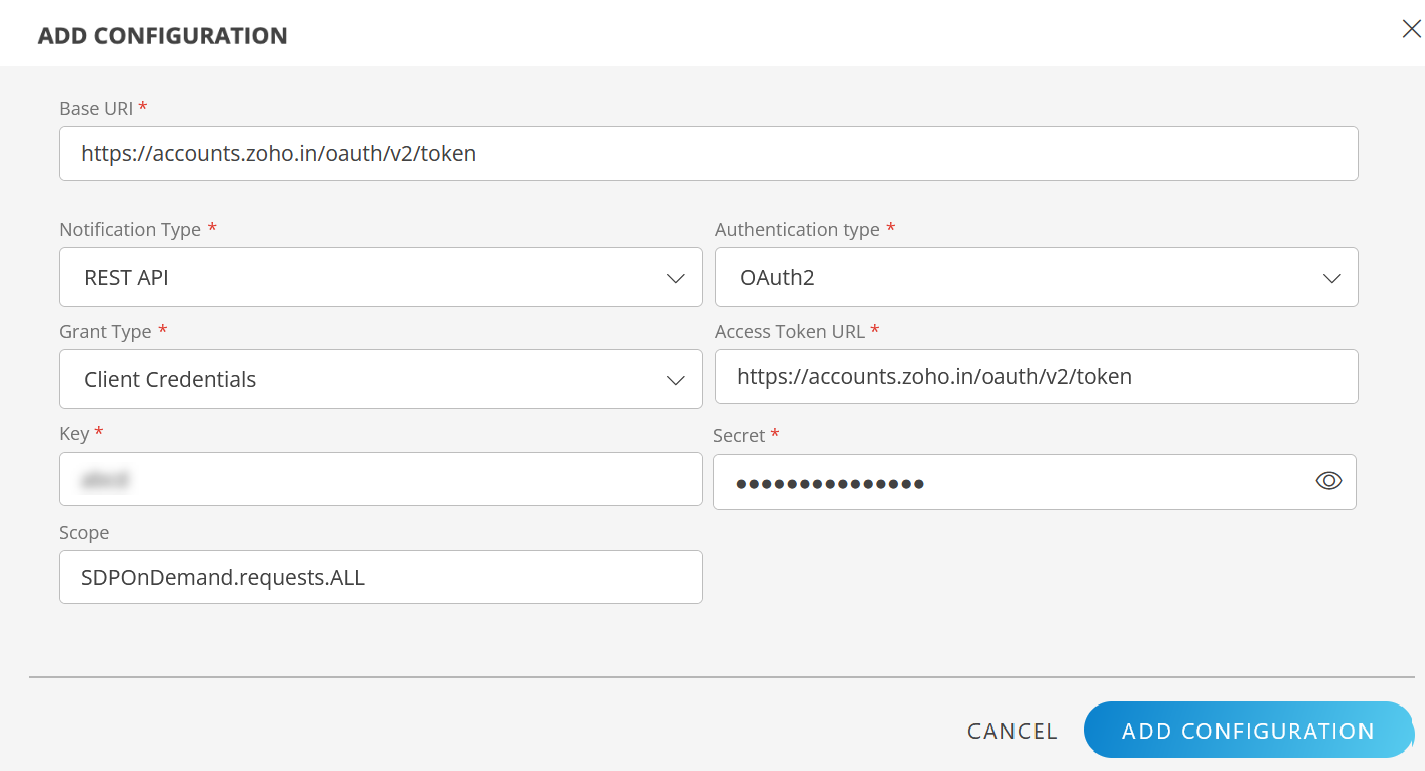
Enter the following information:
Field Name Field Type Description Base URI String Enter the Base URI.
Example: https://accounts.zoho.in/oauth/v2/tokenNotification Type Dropdown Select REST API. Authentication type Dropdown Select OAuth2. Grant Type Dropdown Select Client Credentials. Access Token URL String Enter the Access Token URL.
Example: https://accounts.zoho.in/oauth/v2/tokenKey String Enter the Key from the developer console. Secret String Enter the Secret from the developer console. Scope String Enter the scope, which control the type of resource that the client application can access.
Example: SDPOnDemand.requests.ALL OAUTH2.Click ADD CONFIGURATION.

- Map Attributes: From the Map Attributes window, enter the below information:
- OpsRamp Entity: Select the OpsRamp entity from dropdown.
Example: Incident. - OpsRamp Property: Select the OpsRamp property from dropdown. It will change based on entity selection.
- meservicedeskplus Entity: Enter the ServiceDesk entity.
- meservicedeskplus Property: Enter the ServiceDesk property.
- Click +Property Value in the Property Values section, and enter meservicedeskplus Property Value and OpsRamp Property Value and click Save.
Note:- The Property values section appears based on the OpsRamp Property selected.
- To add property values, click +Property Value.
- To map more attributes, click +Entity.
- Click Add Map Attributes .
- OpsRamp Entity: Select the OpsRamp entity from dropdown.
- Events: Events are for sending notifications when an action is performed on OpsRamp entities.
- Click Add in the Events section.
- Enter a name for the event.
- Select the Entity, Entity Type, and Entity Type Event from the drop-down lists.
- (Optional) Under Advanced Settings, enter the values for Property, Operator, and Value and click Save.
- From Actions:
- Select Use Parent Configuration checkbox to inherit parent configuration.
Example: - Enter the Endpoint URL.
Example:http://<servername>:<port number>/api/v3/requests/. - Select the web method.
- Select Use Parent Configuration checkbox to inherit parent configuration.
- Headers:
- Click +Add and enter/select the header name and value.
Example:- Name: Content-Type. Value: application/x-www-form-urlencoded.
- Name: Accept. Value: application/vnd.manageengine.sdp.v3+json.
- Click Save to save the header name.
- (Optional) Click +Add to add more headers.
- Enter the Payload.
- Click +Add and enter/select the header name and value.
- Response:
- Click +Add and enter/select the response name and value.
Example:- Name: EXT_ENTITY_ID. Value: $request.id.
- Name: STATUS_MSG. Value: $response_status.status.
- Click Save to save the response name.
- (Optional) Click +Add to add more responses.
Note:- The event is created, only if you provide the response properties.
- You cannot enter more than four responses.
- Click +Add and enter/select the response name and value.
- (Optional) Attachment: In the Attachment section, provide inputs in the Process Type, Attachment Endpoint URL, and Web Method fields.
- Attachment Headers: In the Attachment Headers section, provide inputs in the Name and Value fields and click Save.
- Enter the payload in the Attachment Payload box.
- Enter the Key and Value in the Attachment Response section.
- Click Add Event. The event is added.
There are some actions you can perform on the Events.
See here for more details.
Integration response mapping configuration
Response mapping configuration is mainly based on the response payload that is received in third party payload; below are a few examples for response mapping configuration:
- sample response payload to mapping the id in response mapping:
{
"id":"INC0001",
"type":"incident",
"tool":"servicedesk"
}
external ticket id = $id
We need to append $ to the value - sample response payload to mapping the id in response mapping:
{
"result":{
"id":"INC0001",
"type":"incident",
"tool":"servicedesk"
    }
}
external ticket id = $result.id
- Sample response payload to mapping the id in response mapping
{
       "result":[
          {
             "ticketDetails":{
            "id":"INC0001",
            "type":"incident",
            "tool":"servicedesk"
      },
         "Description":{
            "display_value":"testing description",
            "value":"validating"
         }
      }
   ]
}
external ticket id = $result[0].ticketDetails.id
- sample response payload to mapping the Incident Number in response mapping
    {
      "result": {
      "Incident Number": "INC0001",
      "type": "Incident"
      }
    }
external ticket id = $result[‘Incident Number’]
- Failures: In the case of failure in integration, an Email is sent to the user about the failure in integration.
To configure failure notification:- Click add from the Failures section.
- Select notification type as Email.
- Enter the email address(es) in the To and CC fields
- Click Add Failure Notifications. The details are added.
- Click Finish. The integration is installed.
Actions on Integration
You can perform actions on an integration.
- See here for more information.
Actions on Event
Follow these steps to perform actions on the events:
- Click on the integration name.
- Navigate to Outbound tab > Events section.
- Hover over the event name.
- Click the actions (three dots) menu. A popup appears with options.
- Copy Id: To copy an event Id.
- Edit: To edit the event details.
- Save as: To save an event name.
- Validate: Validate if the event is successful.
- Select Json or Form.
- Json: Enter the payload and click Validate.
- Form: Enter the property and value in the fields and click Validate.
A green tick appears if the event is successful
- Json: Enter the payload and click Validate.
- Select Json or Form.
- Remove: To remove an event.
Audit Logs
View logs from the Audit Logs tab. You can view if the event was successful or not.
Integration event payloads
Create Incident
| Field | Value | ||||
|---|---|---|---|---|---|
| Endpoint URL | http://<servername>:<port number>/api/v3/requests | ||||
| Notification Type | REST API | ||||
| Web Method | POST | ||||
| Headers |
Click the Add icon to add multiple values. | ||||
| Payload |
|
Request payload
 {
  "request": {
    "subject": "$incident.subject",
    "description": "$incident.impact",
    "request_type": {
      "name": "Incident"
    },
    "requester": {
      "name": "$incident.createdBy.fullName"
    },
    "priority": {
      "name": "[@$incident.priority.name@]"
    },
    "status": {
      "name": "[@$incident.status.name@]"
    },
    "impact_details": "$incident.impact",
    "udf_fields": {
      "UDF_CHAR20": "$incident.uniqueId"
    }
  }
}
Provide additional API field name in place of UDF_CHAR20
Response
{
    "request": {
        "ola_due_by_time": null,
        "resolution": {
            "resolution_attachments": [],
            "content": null
        },
        "onhold_time": null,
        "is_trashed": false,
        "fr_sla_violated_group": null,
        "id": "18",
        "assigned_time": null,
        "requester": {
            "email_id": null,
            "phone": "1234455",
            "name": "administrator",
            "mobile": "1234567890",
            "profile_pic": {
                "content-url": "/images/default-profile-pic2.svg"
            },
            "is_vipuser": false,
            "id": "5",
            "department": null
        },
        "cancel_requested_by": null,
        "sla_violated_technician": null,
        "item": null,
        "has_resolution_attachments": false,
        "impact": null,
        "sla": null,
        "priority": null,
        "sla_violated_group": null,
        "tags": [],
        "has_notes": false,
        "is_current_ola_violated": null,
        "image_token": "f058d4bb03f0d3e5f6fded34057af6c97d78995a17032583dd27862de2fda7916133843ec290cfd17dea194c2a075e4aa6c3d5d3",
        "status": {
            "color": "#0066ff",
            "name": "Open",
            "id": "2"
        },
        "template": {
            "is_service_template": false,
            "service_category": null,
            "name": "Default Request",
            "id": "1"
        },
        "primary_asset": null,
        "request_type": null,
        "cancel_requested_time": null,
        "chat_type": 0,
        "is_service_request": false,
        "cancel_requested": false,
        "has_request_initiated_change": false,
        "has_attachments": false,
        "has_linked_requests": false,
        "has_request_caused_by_change": false,
        "has_problem": false,
        "subject": "Unable to fetch mails",
        "linked_to_request": null,
        "mode": null,
        "is_read": false,
        "lifecycle": null,
        "reason_for_cancel": null,
        "assets": [],
        "group": null,
        "email_to": [],
        "created_time": {
            "display_value": "Mar 18, 2024 10:17 AM",
            "value": "1710757038415"
        },
        "level": null,
        "approval_status": null,
        "service_category": null,
        "created_by": {
            "email_id": null,
            "phone": "1234455",
            "name": "administrator",
            "mobile": "1234567890",
            "profile_pic": {
                "content-url": "/images/default-profile-pic2.svg"
            },
            "is_vipuser": false,
            "id": "5",
            "department": null
        },
        "scheduled_end_time": null,
        "first_response_due_by_time": null,
        "last_updated_time": null,
        "impact_details": "Tasks are pending",
        "subcategory": null,
        "email_cc": [],
        "scheduled_start_time": null,
        "email_ids_to_notify": [],
        "notification_status": null,
        "description": "Unable to fetch mails from the mail server",
        "has_dependency": false,
        "has_conversation": false,
        "fr_sla_violated_technician": null,
        "callback_url": null,
        "urgency": null,
        "is_shared": false,
        "request_template_task_ids": [],
        "department": null,
        "is_reopened": false,
        "has_draft": false,
        "is_overdue": false,
        "technician": null,
        "due_by_time": null,
        "has_project": false,
        "is_first_response_overdue": false,
        "cancel_requested_is_pending": false,
        "recommend_template": null,
        "unreplied_count": null,
        "category": null,
        "maintenance": null
    },
    "response_status": {
        "status_code": 2000,
        "status": "success"
    }
}
To map ManageEngine ServiceDesk Plus ticket ID with OpsRamp,
select EXT_ENTITY_ID from Response drop-down and enter the
$request.id value.
Update incident
| Field | Value | ||||
|---|---|---|---|---|---|
| Endpoint URL | http://<servername>:<port number>/api/v3/requests/$utils.extEntityId($incident.id,$installedAppId,$entity) | ||||
| Notification Type | REST API | ||||
| Web Method | PUT | ||||
| Headers |
| ||||
| Payload |
|
Request payload
    {
  "request": {
    "subject": "$incident.subject",
    "description": "$incident.impact",
    "request_type": {
      "name": "Incident"
    },
    "priority": {
      "name": "[@$incident.priority.name@]"
    },
    "status": {
      "name": "[@$incident.status.name@]"
    },
    "impact_details": "$incident.impact",
    "udf_fields": {
      "UDF_CHAR20": "$incident.uniqueId"
    }
  }
}
Provide additional API field name in place of UDF_CHAR20
Response
   {
    "request": {
        "ola_due_by_time": null,
        "resolution": {
            "resolution_attachments": [],
            "content": null
        },
        "onhold_time": null,
        "is_trashed": false,
        "fr_sla_violated_group": null,
        "id": "18",
        "assigned_time": null,
        "requester": {
            "email_id": null,
            "phone": "1234455",
            "name": "administrator",
            "mobile": "1234567890",
            "profile_pic": {
                "content-url": "/images/default-profile-pic2.svg"
            },
            "is_vipuser": false,
            "id": "5",
            "department": null
        },
        "cancel_requested_by": null,
        "sla_violated_technician": null,
        "item": null,
        "has_resolution_attachments": false,
        "impact": null,
        "sla": {
            "name": "High SLA",
            "id": "4"
        },
        "priority": {
            "color": "#ff0000",
            "name": "High",
            "id": "4"
        },
        "sla_violated_group": null,
        "tags": [],
        "has_notes": false,
        "is_current_ola_violated": null,
        "image_token": "1fd69830b17420ba341af26161af2c45f6b915d3a97e00beb0095416f72164ffa8bd25c229dbb1f15029dd3c37cc598fcfbaef6c",
        "status": {
            "color": "#0066ff",
            "name": "Open",
            "id": "2"
        },
        "template": {
            "is_service_template": false,
            "service_category": null,
            "name": "Default Request",
            "id": "1"
        },
        "primary_asset": null,
        "request_type": null,
        "cancel_requested_time": null,
        "chat_type": 0,
        "is_service_request": false,
        "cancel_requested": false,
        "has_request_initiated_change": false,
        "has_attachments": false,
        "has_linked_requests": false,
        "has_request_caused_by_change": false,
        "has_problem": false,
        "subject": "Need an External Monitor",
        "linked_to_request": null,
        "mode": null,
        "is_read": false,
        "lifecycle": null,
        "reason_for_cancel": null,
        "assets": [],
        "group": null,
        "email_to": [],
        "created_time": {
            "display_value": "Mar 18, 2024 10:17 AM",
            "value": "1710757038415"
        },
        "level": null,
        "approval_status": null,
        "service_category": null,
        "created_by": {
            "email_id": null,
            "phone": "1234455",
            "name": "administrator",
            "mobile": "1234567890",
            "profile_pic": {
                "content-url": "/images/default-profile-pic2.svg"
            },
            "is_vipuser": false,
            "id": "5",
            "department": null
        },
        "scheduled_end_time": null,
        "first_response_due_by_time": null,
        "last_updated_time": {
            "display_value": "Mar 18, 2024 10:23 AM",
            "value": "1710757434369"
        },
        "impact_details": "Details of the impact",
        "subcategory": null,
        "email_cc": [],
        "scheduled_start_time": null,
        "email_ids_to_notify": [],
        "notification_status": null,
        "description": "Provide me an External Monitor",
        "has_dependency": false,
        "has_conversation": false,
        "fr_sla_violated_technician": null,
        "callback_url": null,
        "urgency": null,
        "is_shared": false,
        "request_template_task_ids": [],
        "department": null,
        "is_reopened": false,
        "has_draft": false,
        "is_overdue": false,
        "technician": null,
        "due_by_time": {
            "display_value": "Mar 18, 2024 11:17 AM",
            "value": "1710760638415"
        },
        "has_project": false,
        "is_first_response_overdue": false,
        "cancel_requested_is_pending": false,
        "recommend_template": null,
        "unreplied_count": null,
        "category": null,
        "maintenance": null
    },
    "response_status": {
        "status_code": 2000,
        "status": "success"
    }
}
To map the ManageEngine ServiceDesk Plus status property with OpsRamp,
select STATUS_MSG from the Response drop-down and enter the $response_status.status value.
Add response to incident
| Field | Value | ||||
|---|---|---|---|---|---|
| Endpoint URL | http://<servername>:<port number>/api/v3/requests/$utils.extEntityId($incident.id,$installedAppId,$entity)/notes | ||||
| Notification Type | REST API | ||||
| Web Method | POST | ||||
| Headers |
| ||||
| Payload |
|
Request payload
{
    "note": {
        "description": "Need info on this topic.",
        "show_to_requester": true,
        "mark_first_response": false,
        "add_to_linked_requests": true
    }
}
Response
    {
    "note": {
        "request": {
            "subject": "Need an External Monitor",
            "id": "18"
        },
        "last_updated_by": null,
        "added_time": {
            "display_value": "Mar 18, 2024 10:59 AM",
            "value": "1710759585717"
        },
        "has_attachments": false,
        "attachments": [],
        "last_updated_time": null,
        "added_by": {
            "email_id": null,
            "phone": "1234455",
            "name": "administrator",
            "mobile": "1234567890",
            "profile_pic": {
                "content-url": "/images/default-profile-pic2.svg"
            },
            "is_vipuser": false,
            "id": "5",
            "department": null
        },
        "image_token": "a55d58adbd4cddc167a3f0f7dd046ce1e1367e4d83c2a3399e6d163d3a3a3dabde1d51bb60f05737146153ab6420072a5c8c8f33",
        "show_to_requester": true,
        "description": "Need info on this topic.",
        "id": "3"
    },
    "response_status": {
        "status_code": 2000,
        "status": "success"
    }
}
To manage ManageEngine ServiceDesk Plus status property with OpsRamp,
select STATUS_MSG from Response drop-down and enter the $response_status.status value.
ManageEngine ServiceDesk Plus Configuration
Generate Key and Secret for ServiceDesk Plus Cloud APIs
The Key and Secret are required to post OpsRamp events as ServiceDesk Plus Incidents using ServiceDesk Plus APIs.
Follow these steps to generate Key and Secret of ManageEngine ServiceDesk Plus Cloud:
- Log into developer console. Example: https://api-console.zoho.in/.
- Click Self Client on API Console screen.
- Click CREATE.
- Click OK on the confirmation popup.
- Copy the Client ID and Client Secret.
Configure Inbound Integration
Click here to learn how to configure Inbound Integration
Follow these steps to configure Inbound integration:
(From ManageEngine ServiceDesk Plus to OpsRamp)
Create Additional Field
Create an additional field in Manage Engine Service Desk Plus to keep track of OpsRamp Incident Id for proper handling of create and update incidents.
Follow these steps to create an additional field:
- Click Admin (gear icon) at the top-right corner of the screen.
- Under Customization click Additional Fields. The Additional Fields screen is displayed.
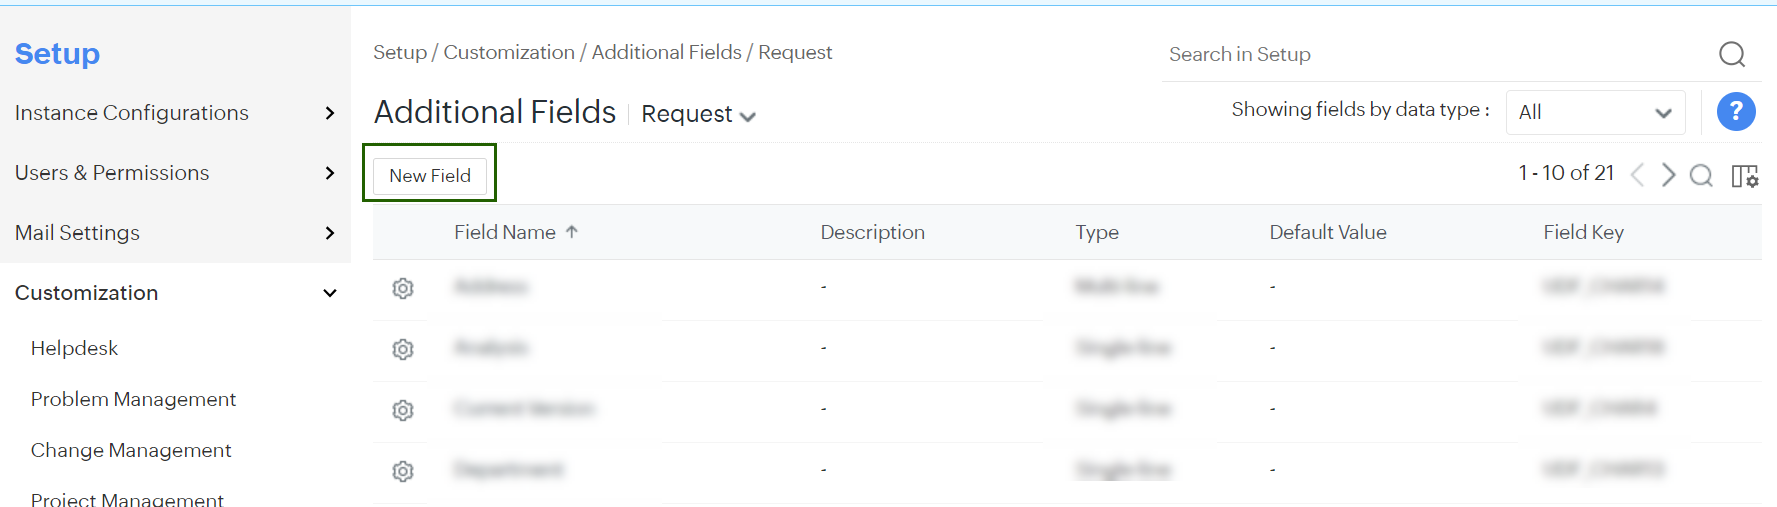
- Click the New Field button. The New Field window is displayed.
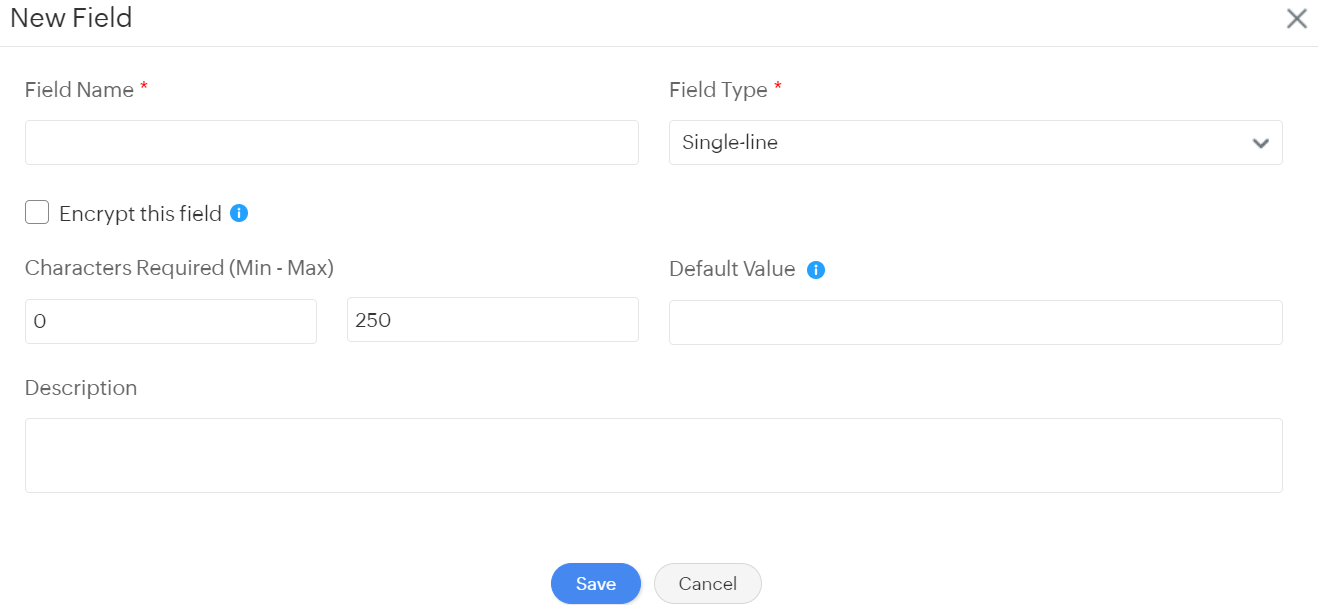
- Enter the following details:
- Field Name: Enter the field name as EXT_REQ_ID.
- Description: Enter the description as EXT_REQ_ID.
- Click Save.


Modify Incident Template
Modify the Incident template to display the OpsRamp Incident ID in incidents.
Click Admin (gear icon) at the top-right corner of the screen.
Under Templates & Forms, click Incident Template. The Incident Template screen is displayed.
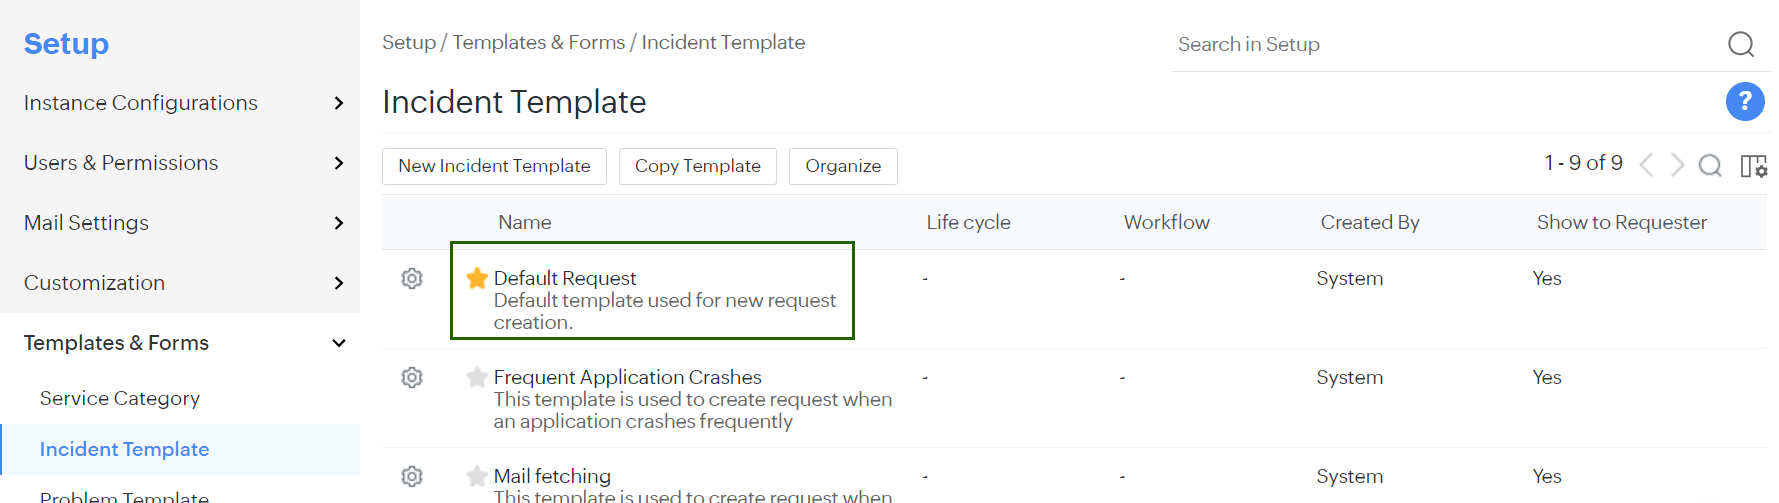
Click the Default Request template to edit.
Drag and drop the EXT_REQ_ID field (created in the previous step - EXT_REQ_ID) from Available Fields to the left side.
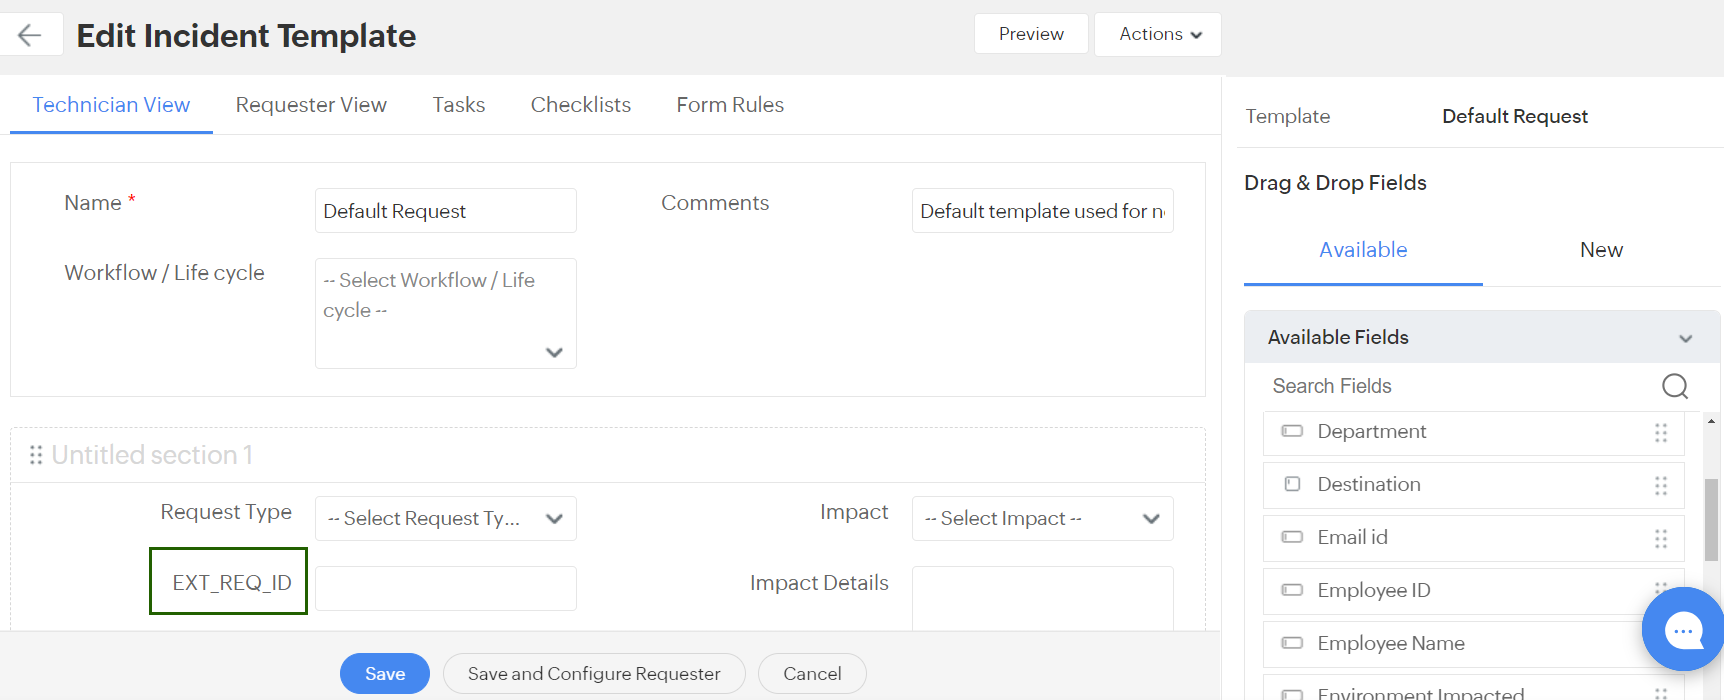
Click Save.


Create Custom Service and Connection
In order to use OAuth2 authentication for OpsRamp APIs, you should create custom service and custom connection in ManageEngine SDP cloud deployment.
Create Custom Service
Follow these steps to create custom service:
Click Admin (gear icon) at the top-right corner of the screen.
Under Developer Space, click Connections.
Under Services click Custom Services. The Connections screen is displayed.
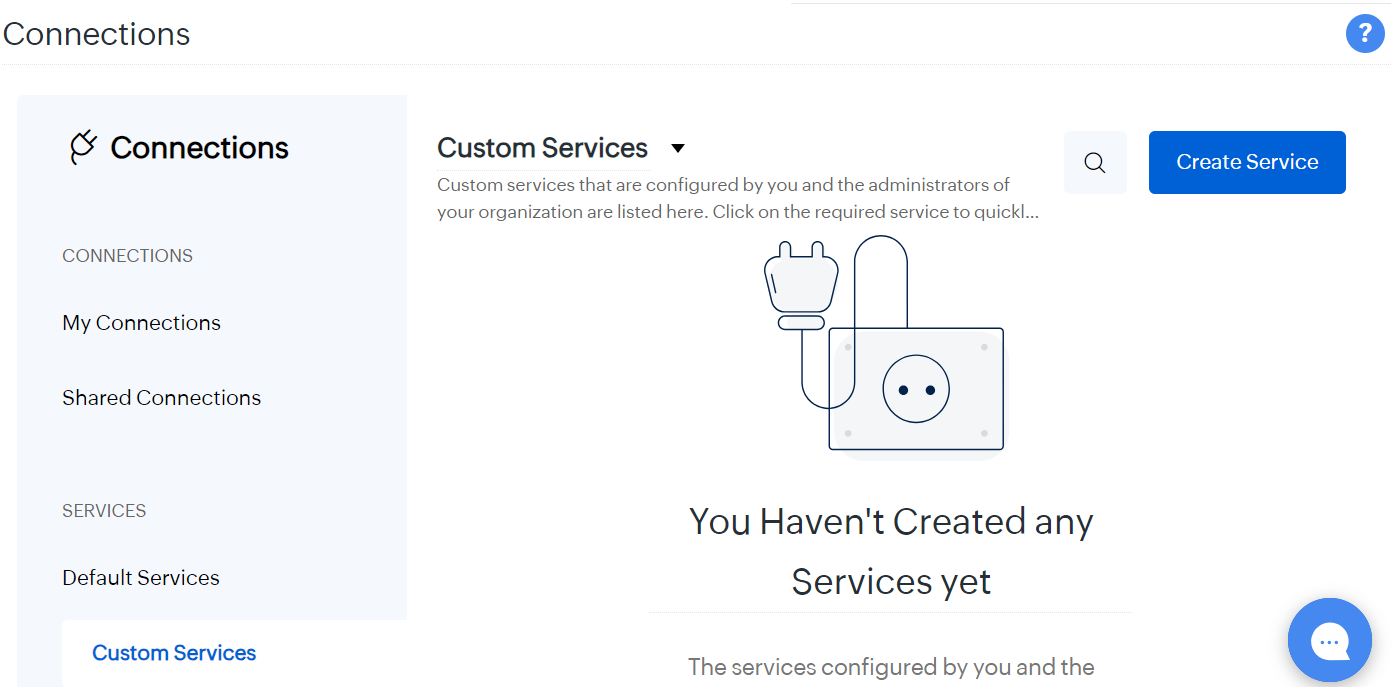
Click Create Service. The Create Service screen is displayed.
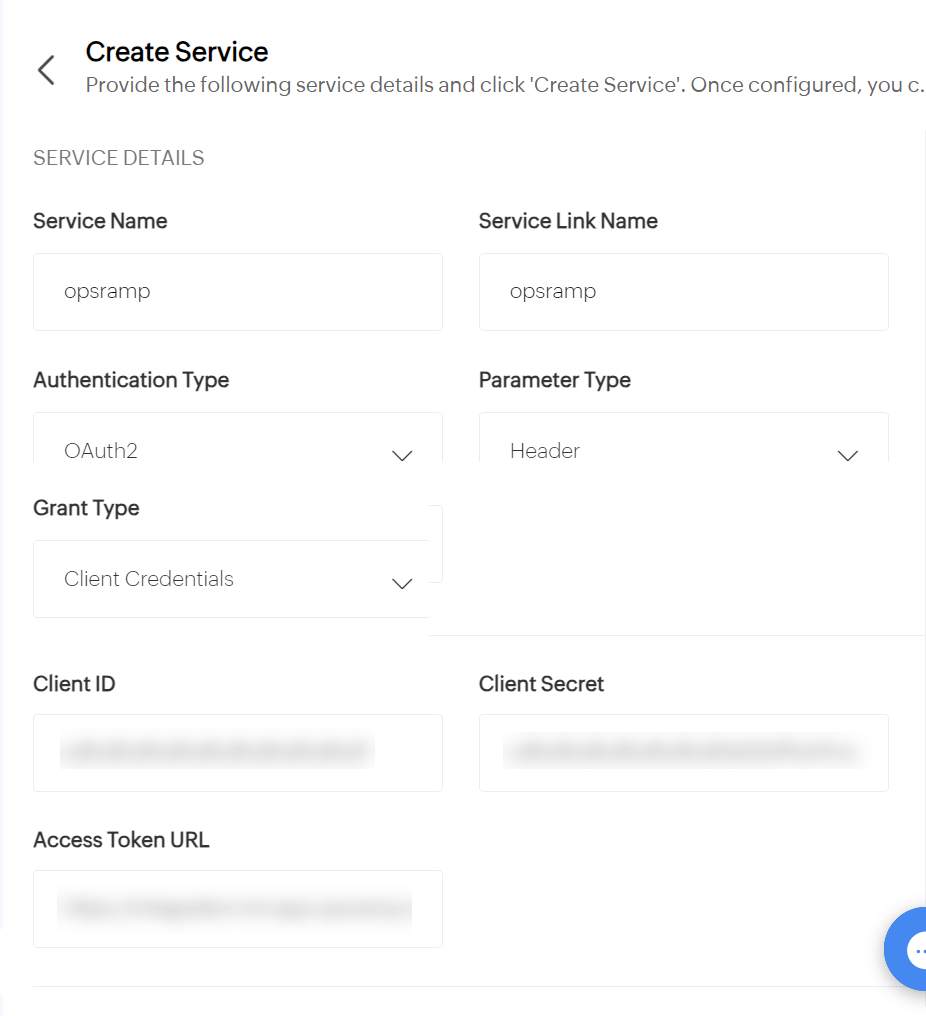
Enter the following details:
- Service Name: Enter the service name. Example: opsramp.
- Service Link Name: Enter the service link name. Example: opsramp.
- Parameter Type: Select Parameter Type as Header.
- Grant Type: Select Grant Type as Client Credentials.
- Authentication Type: Select Authentication Type as OAuth2.
- Client ID: Enter the Client ID. You can find the Client ID from the Inbound tab of ManageEngine Service Desk Plus integration in OpsRamp for the respective client.
- Client Secret: Enter the Client Secret. You can find the Client Secret from the Inbound tab of ManageEngine Service Desk Plus integration in OpsRamp for the respective client.
- Access Token URL: Enter the Access Token URL.
Example:https://{domain}/auth/oauth/token.
Click Create Service.


Create Connection
Follow these steps to create a connection:
Click Admin (gear icon) at the top-right corner of the screen.
Under Developer Space, click Connections.
Click Create Connection. The Connections screen is displayed.
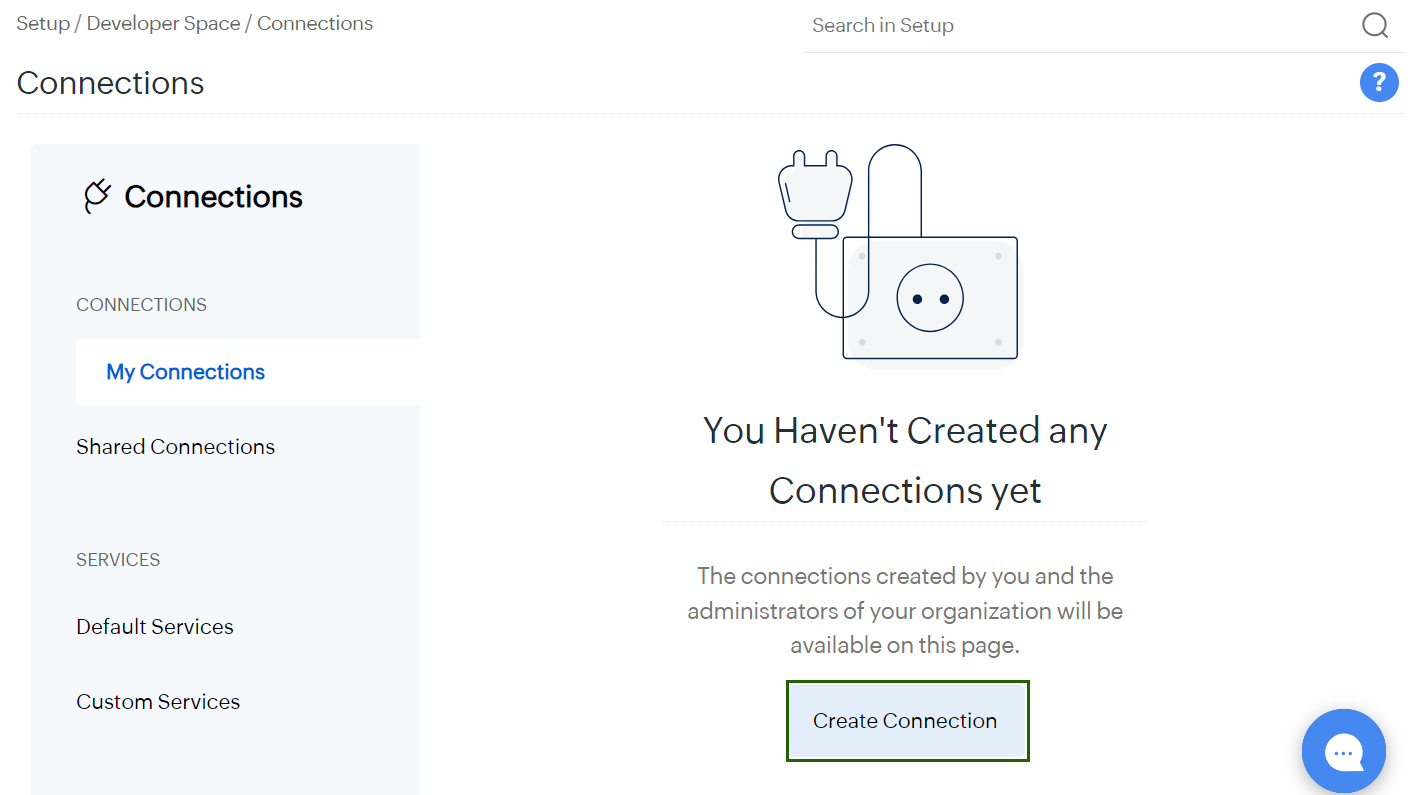
Click Create Connection. The Create Connection screen is displayed.
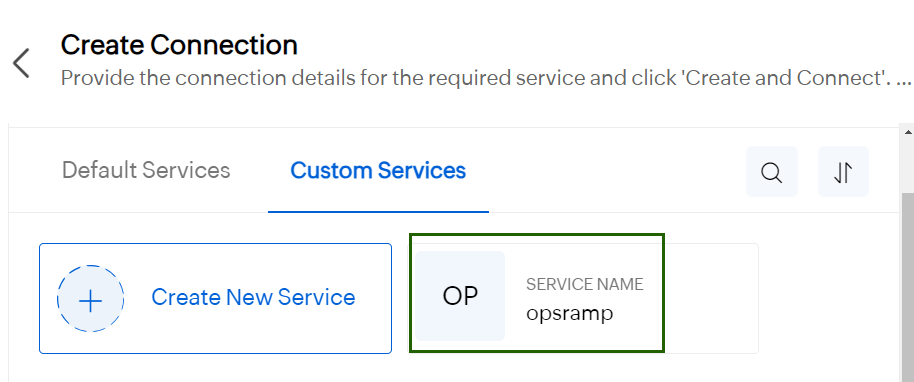
Click Custom Services tab. Click on the custom service that you created above. Example: opsramp.
Enter Connection Name and Connection Link Name. Example: opsramp.
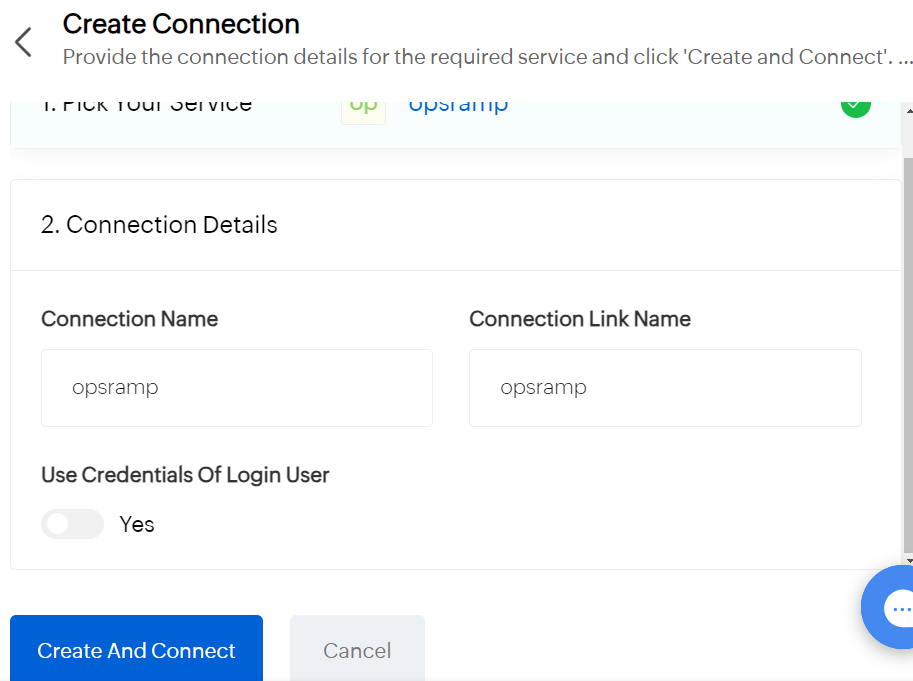
Click Create And Connect.
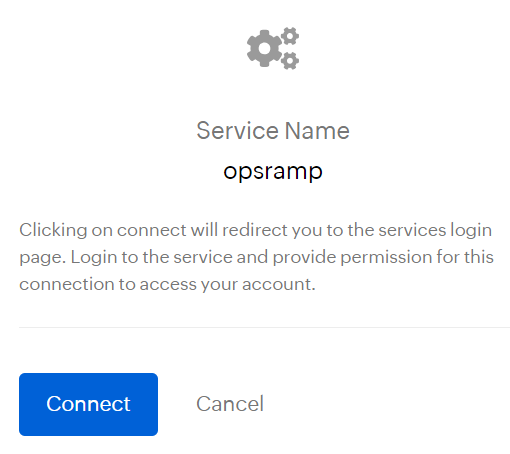
Click Connect.
After successful connect with the Access Token URL, the status is shown as “Connected” in Connections screen.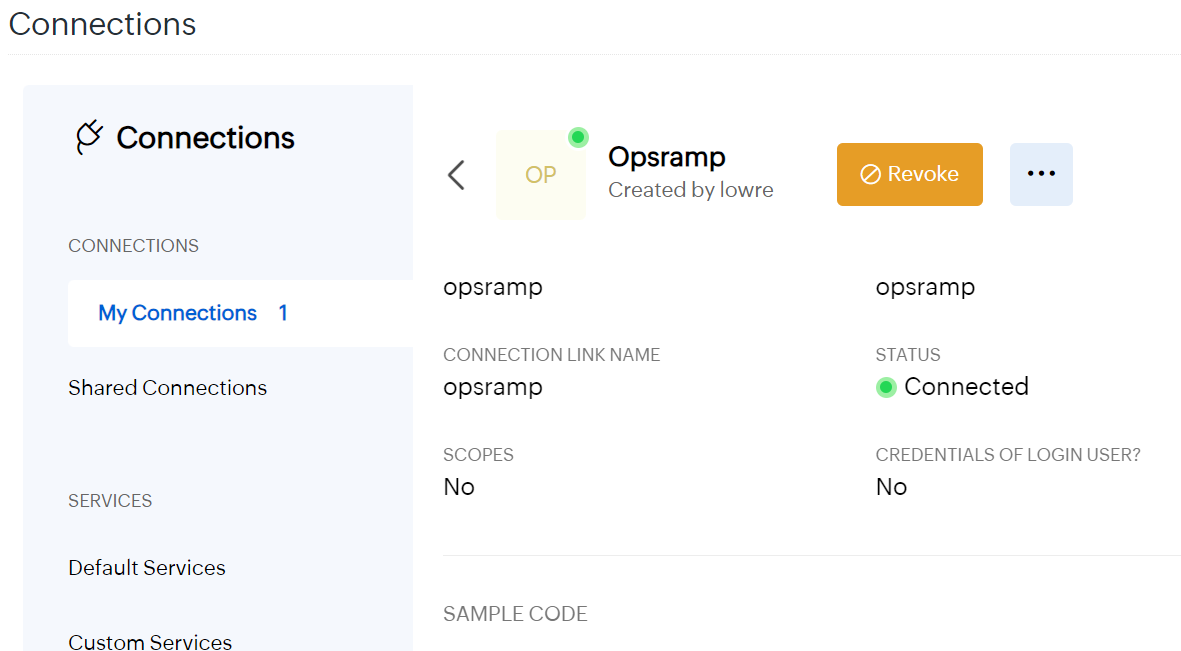


Configure Custom Functions
Under Custom Functions, do the following:
Create Incident Function
- Click Admin (gear icon) at the top-right corner of the screen.
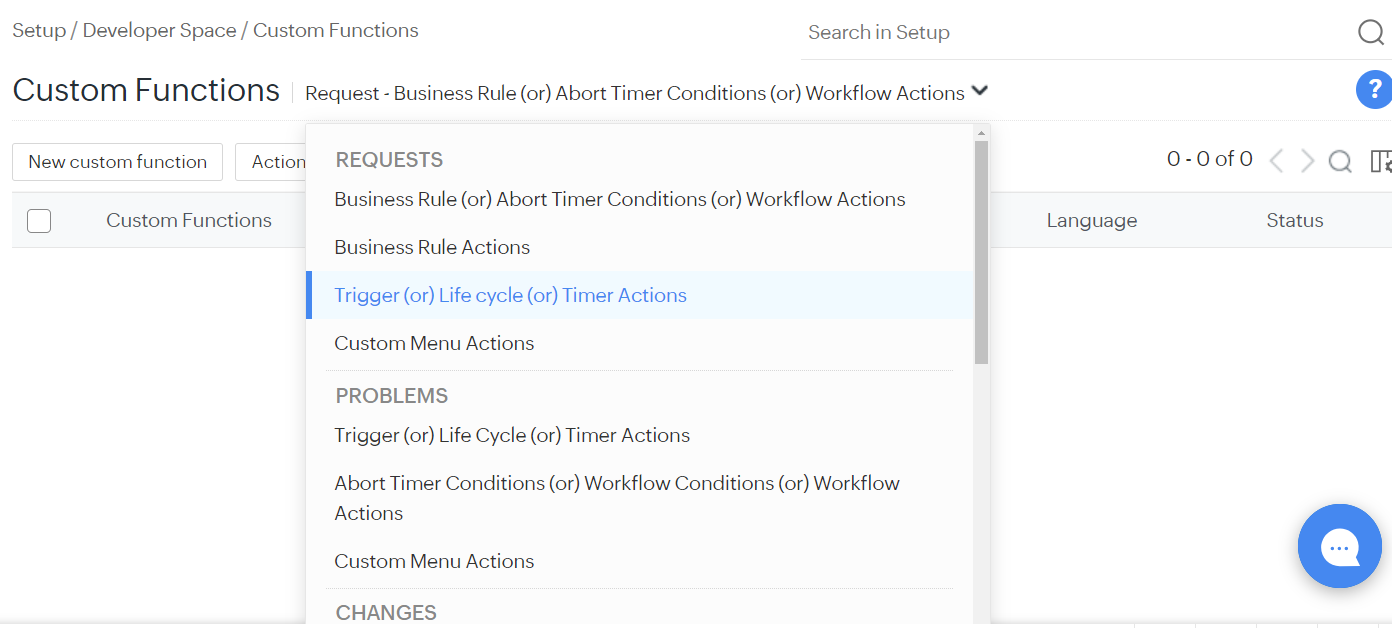
- Under Developer Space, click Custom Functions. The Custom Functions screen is displayed.
- Click the Request dropdown and select Select Trigger (or) Life Cycle (or) Timer Actions.
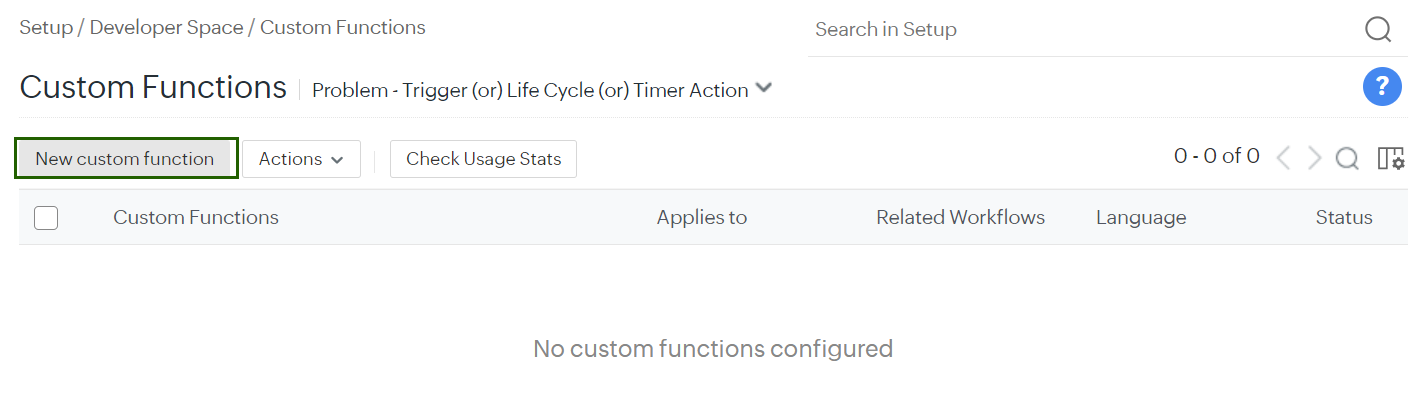
- Click New custom function button.
- Custom Function Name: Enter the Custom Function Name.
Example: OpsRamp Create Function. - Description: Enter the description.
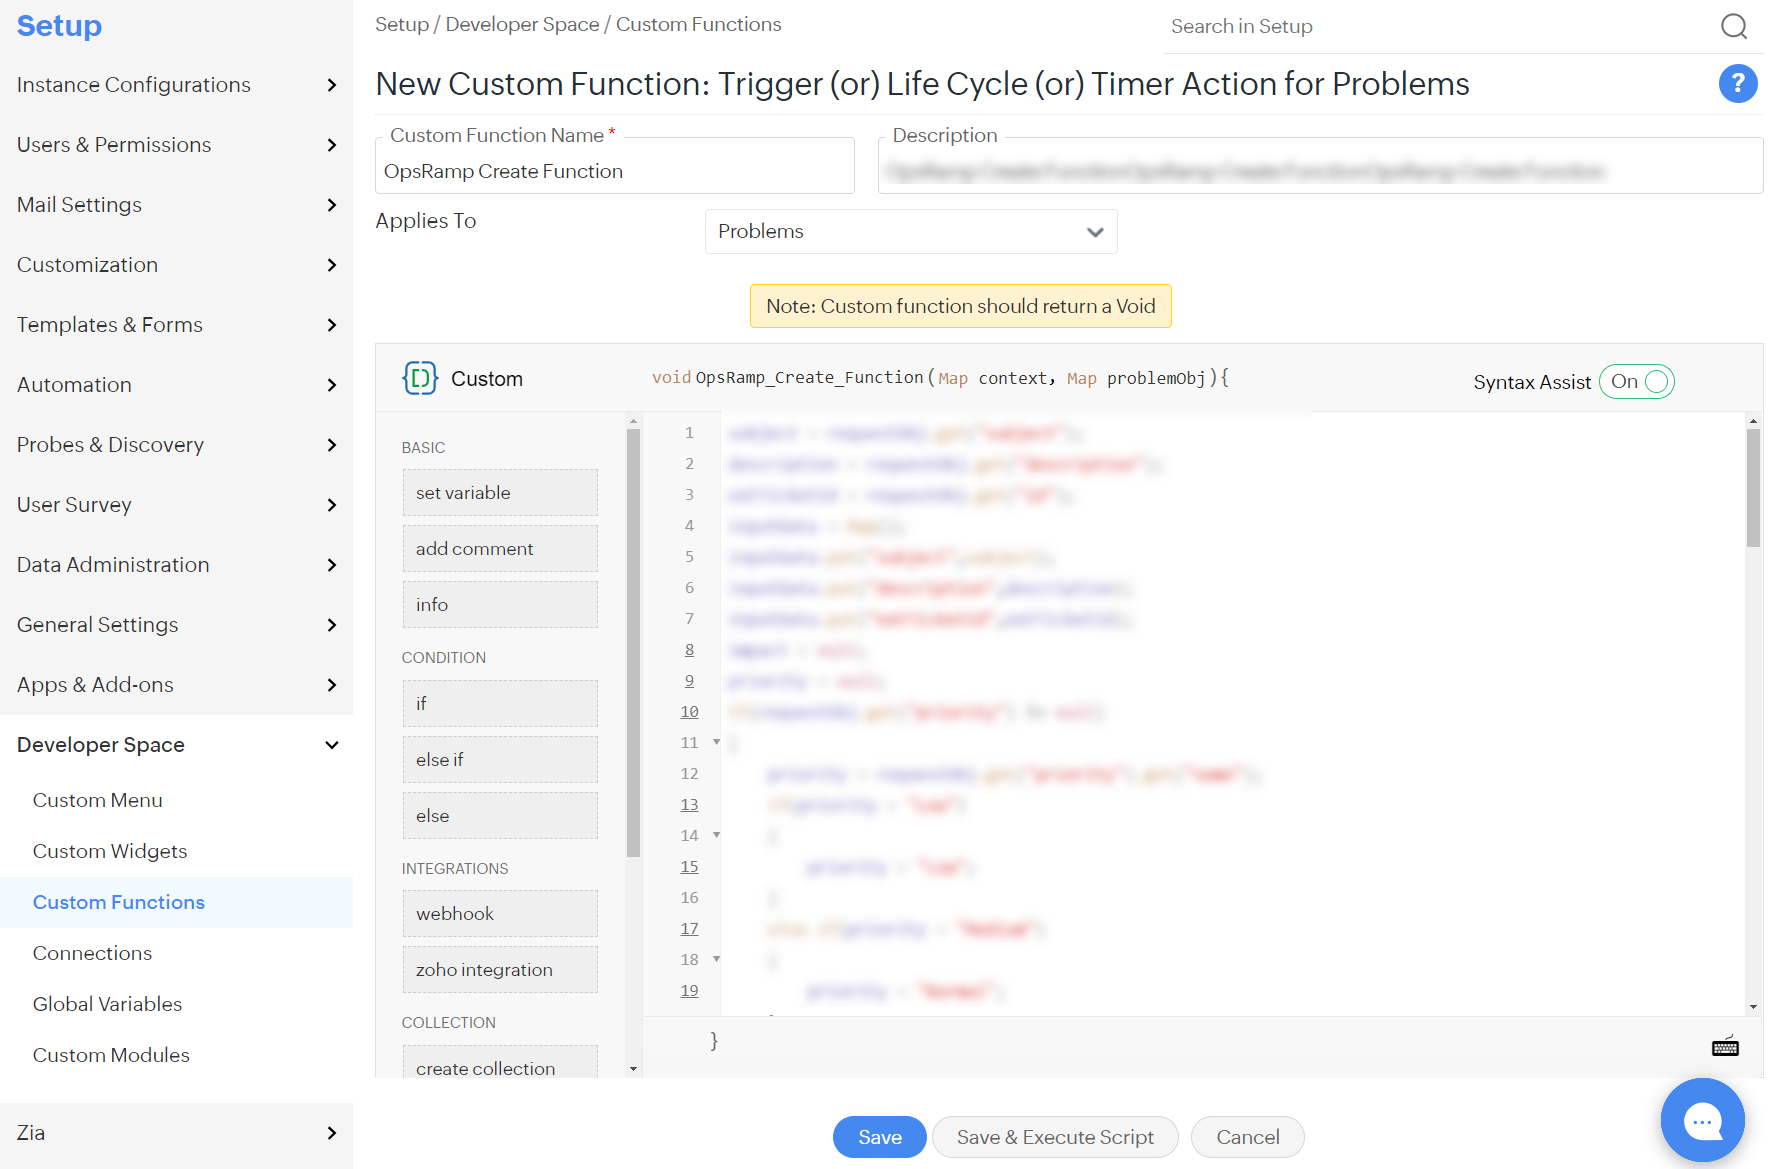
- Provide the script given below in Custom Function field:


Script
  subject = requestObj.get("subject");
  description = requestObj.get("description");
  extTicketId = requestObj.get("id");
  inputData = Map();
  inputData.put("subject",subject);
  inputData.put("description",description);
  inputData.put("extTicketId",extTicketId);
  impact = null;
  priority = null;
  if(requestObj.get("priority") != null)
{
    priority = requestObj.get("priority").get("name");
    if(priority = "Low")
  {
      priority = "Low";
  }
    else if(priority = "Medium")
  {
      priority = "Normal";
  }
    else if(priority = "Normal")
  {
      priority = "High";
  }
    else if(priority = "High")
  {
      priority = "Urgent";
  }
    inputData.put("priority",priority);
}
  status = null;
  if(requestObj.get("status") != null)
{
    status = requestObj.get("status").get("name");
    if(status = "Open")
  {
      status = "Open";
  }
    else if(status = "Resolved")
  {
      status = "Resolved";
  }
    else if(status = "Closed")
  {
      status = "Closed";
  }
    else if(status = "onhold")
  {
      status = "On Hold";
  }
    inputData.put("status",status);
}
  urgency = null;
  if(requestObj.get("urgency") != null)
{
    urgencyMap = Map();
    urgency = requestObj.get("urgency").get("name");
    urgencyMap.put("name",urgency);
    inputData.put("urgency",urgencyMap);
}
impact = null;
if(requestObj.get("impact") != null)
{
  impactMap = Map();
  impact = requestObj.get("impact").get("name");
  impactMap.put("name",impact);
  inputData.put("businessImpact",impactMap);
}
info "Request : " + inputData;
headerData = Map();
//headerData.put("Authorization","Bearer e3ab58a9-e83d-4c16-bc38-e83e46958976");
headerData.put("Content-Type","application/json");
createInOpsRamp = invokeurl
[
  url :"https://integration.int-app.opsramp.net/api/v2/tenants/e3093dbb-392c-456d-b4ef-aa8b14a3ba49/incidents/"
  type :POST
  parameters:inputData.toString()
  headers:headerData
  connection:"opsramp"
];
info "Response : " + createInOpsRamp;
opsRampIncidentId = createInOpsRamp.get("id");
info "meSdpId :: " + extTicketId;
info "opsRampIncidentId ::" + opsRampIncidentId;
updateRequestWithOpsRampIncidentId = zoho.sdp.invokeurl
[
  url :"/app/" + context.get("instance") + "/api/v3/requests/" + requestObj.get("id")
  type :PUT
  parameters:{"input_data":{"request":{"udf_fields":{"udf_char2":opsRampIncidentId}}}}
];
info "UpdateRequest_Response::" + updateRequestWithOpsRampIncidentId;
//udfId = updateRequestWithOpsRampIncidentId.get("request").get("udf_fields").get("udf_char2");
//info "opsRampIncidentId ::" + udfId;
- There are some fields in the script which can be modified accordingly.
- Change tenantId and domain in the URL:
- URL:
https://{domain}/api/v2/tenants/{tenantId}/incidents/ - Change the tenantId as per the integration installed in OpsRamp.
- URL:
- Change connection name:
- Connection: “opsramp”
- Enter the Connection Name as mentioned in Create Connection.
- Update additional fields:
- Parameters:
{"input_data":{"request":{"udf_fields":{"udf_char20":opsRampIncidentId}}}} - Ensure that
udf_char20matches the value specified in Create Additional Field.
- Parameters:
- Change tenantId and domain in the URL:
- Click Save & Execute Script to test the custom function. The Test Execute window is displayed.
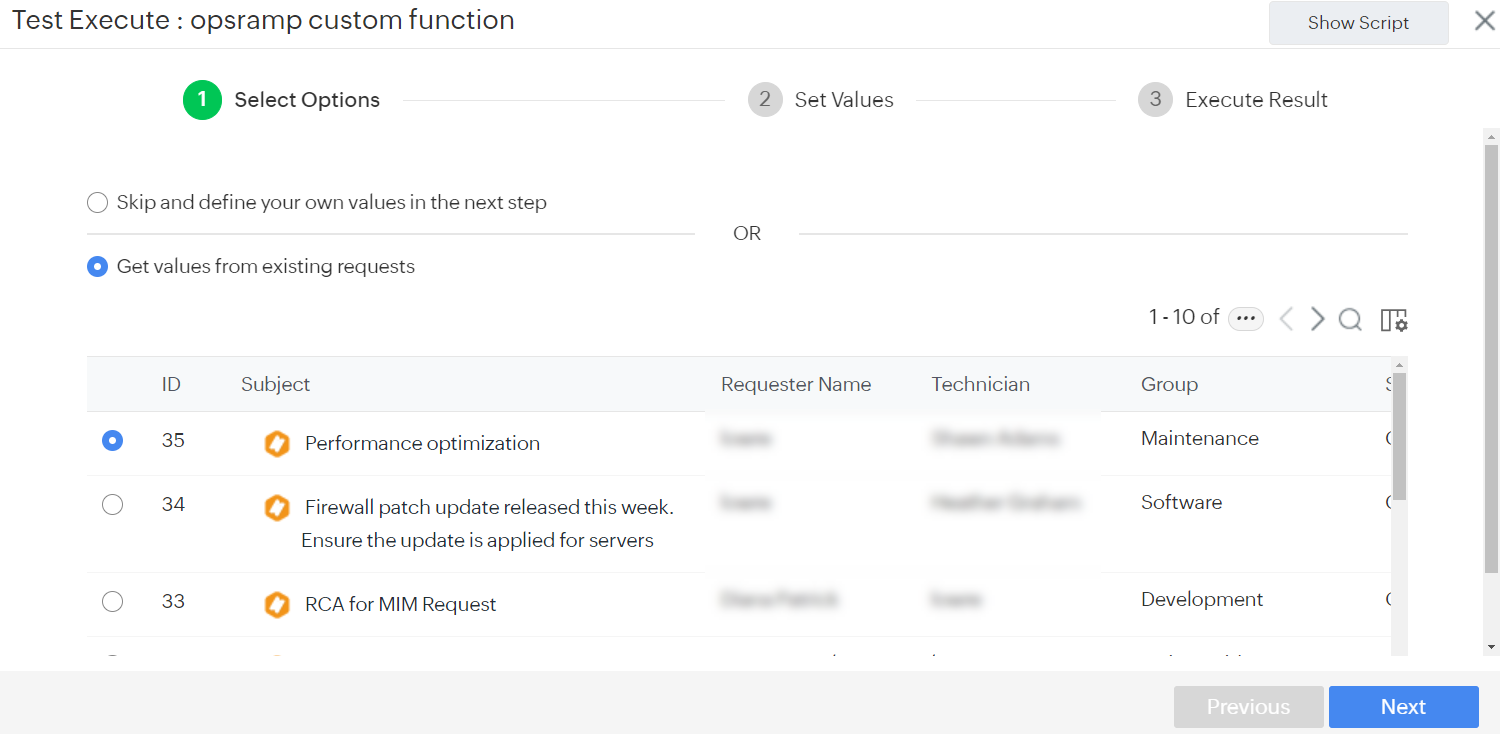
- Select the Get values from existing requests option.
- Select one of the request radio button.
- Click Next. The Set Values screen is displayed.
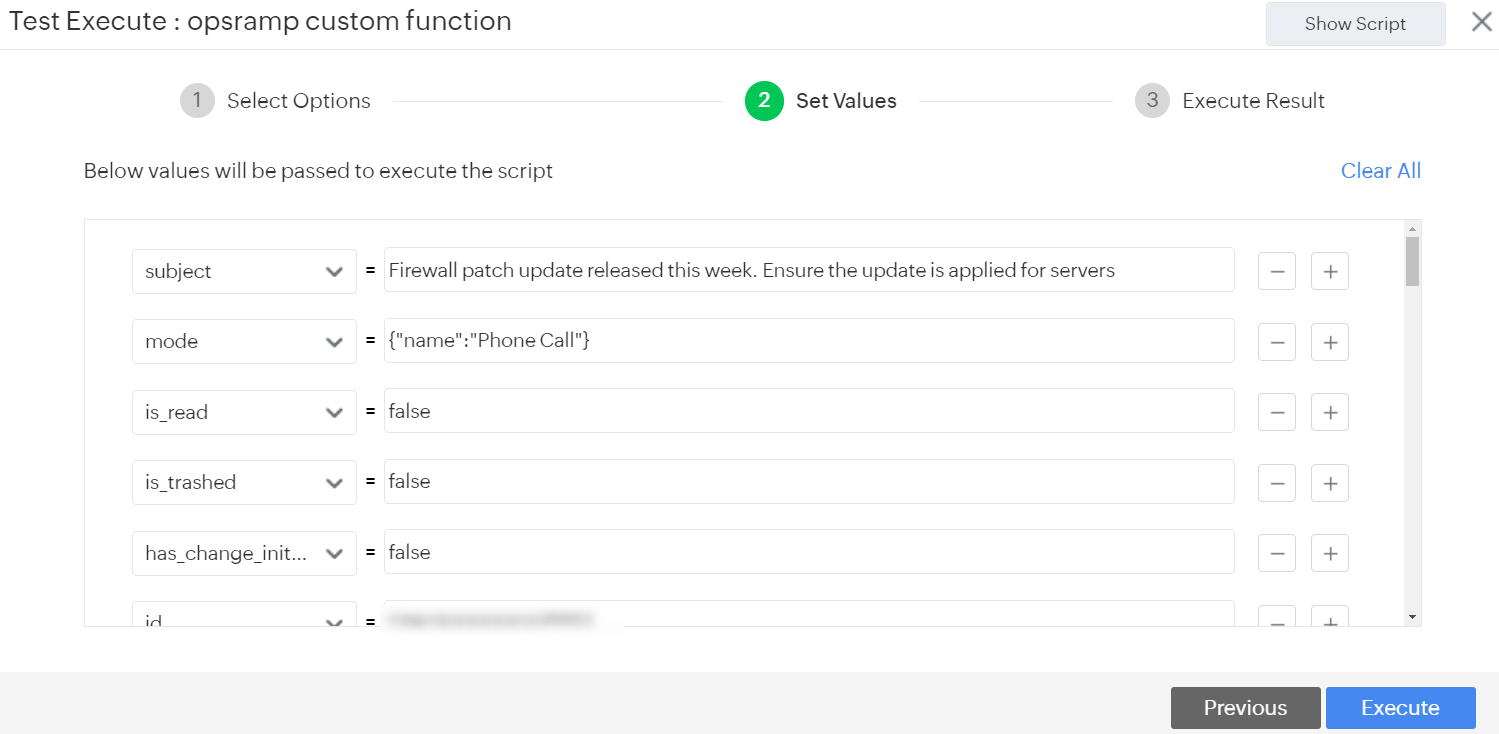
- Click Execute.
- Once it reaches the OpsRamp Incident API using the access token generated from the connection, the below screen is displayed:
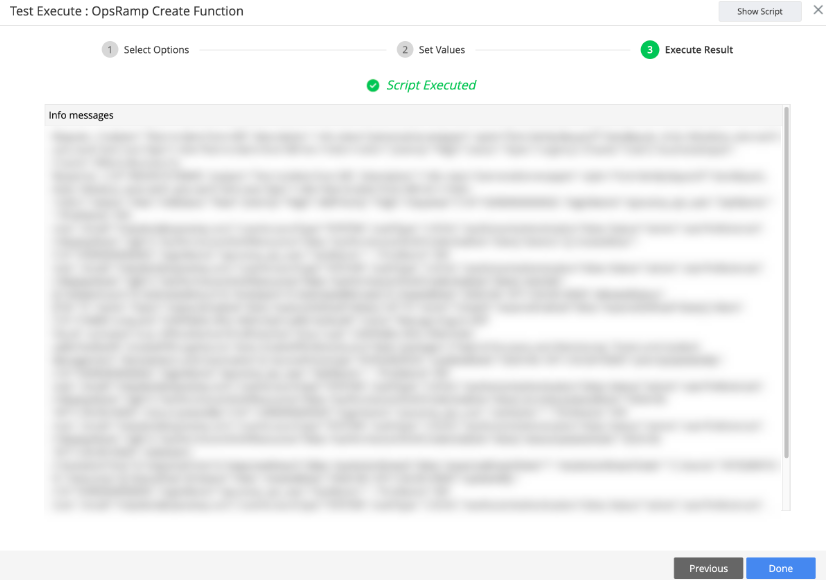
- Sample Create incident custom function script response:


Create Incident Response
Request : {"subject":"Manage Engine Incident creation","description":"Manage Engine Incident creation","priority":"High","status":"Open"}
Response : {"id":"INC0010194679","subject":"Manage Engine Incident creation","description":"Manage Engine Incident creation","status":"New","oldStatus":"New","priority":"High","oldPriority":"High","requester":{"id":"USR0000000002","loginName":"opsramp_api_user","lastName":" ","firstName":"API User","email":"helpdesk@opsramp.com","userAccountType":"SYSTEM","authType":"LOCAL","twoFactorAuthentication":false,"status":"active","userPreferences":{"displayMode":"light"},"hasPermissionOnAllResources":false,"hasPermissionOnAllCredentialSets":false},"devices":[],"createdUser":{"id":"USR0000000002","loginName":"opsramp_api_user","lastName":" ","firstName":"API User","email":"helpdesk@opsramp.com","userAccountType":"SYSTEM","authType":"LOCAL","twoFactorAuthentication":false,"status":"active","userPreferences":{"displayMode":"light"},"hasPermissionOnAllResources":false,"hasPermissionOnAllCredentialSets":false},"alertIds":[],"reOpenCount":0,"estimatedHours":0,"timeSpent":0,"estimatedMinutes":0,"createdDate":"2024-06-14T13:34:12+0000","allowedStatus":[{"id":"2","name":"Open","reasonsEnabled":false,"reasonsDefined":false},{"id":"5","name":"Closed","reasonsEnabled":false,"reasonsDefined":false}],"client":{"id":174489,"uniqueId":"e3093dbb-392c-456d-b4ef-aa8b14a3ba49","name":"Manage Engine SDP Cloud","activated":true,"offlineAlertstoThirdPartyTool":false,"uuid":"e3093dbb-392c-456d-b4ef-aa8b14a3ba49","enablePRCLogsSource":false,"enablePRCAlertsSource":false,"packages":["Hybrid Discovery and Monitoring","Event and Incident Management","Remediation and Automation"]},"sourcePolicyType":"INTEGRATION","updatedDate":"2024-06-14T13:34:12+0000","priorityUpdatedBy":{"id":"USR0000000002","loginName":"opsramp_api_user","lastName":" ","firstName":"API User","email":"helpdesk@opsramp.com","userAccountType":"SYSTEM","authType":"LOCAL","twoFactorAuthentication":false,"status":"active","userPreferences":{"displayMode":"light"},"hasPermissionOnAllResources":false,"hasPermissionOnAllCredentialSets":false},"priorityUpdatedDate":"2024-06-14T13:34:12+0000","statusUpdatedBy":{"id":"USR0000000002","loginName":"opsramp_api_user","lastName":" ","firstName":"API User","email":"helpdesk@opsramp.com","userAccountType":"SYSTEM","authType":"LOCAL","twoFactorAuthentication":false,"status":"active","userPreferences":{"displayMode":"light"},"hasPermissionOnAllResources":false,"hasPermissionOnAllCredentialSets":false},"statusUpdatedDate":"2024-06-14T13:34:12+0000","slaDetails":{"resolutionTime":3,"responseTime":0,"responseBreach":false,"resolutionBreach":false,"responseBreachDate":"","resolutionBreachDate":""},"source":"INTEGRATION","resources":[],"statusFlow":[{"status":"New","createdDate":"2024-06-14T13:34:12+0000","updatedBy":{"id":"USR0000000002","loginName":"opsramp_api_user","lastName":" ","firstName":"API User","email":"helpdesk@opsramp.com","userAccountType":"SYSTEM","authType":"LOCAL","twoFactorAuthentication":false,"status":"active","userPreferences":{"displayMode":"light"},"hasPermissionOnAllResources":false,"hasPermissionOnAllCredentialSets":false}}],"originalTicketId":"","lastUpdatedBy":{"id":"USR0000000002","loginName":"opsramp_api_user","lastName":" ","firstName":"API User","email":"helpdesk@opsramp.com","userAccountType":"SYSTEM","authType":"LOCAL","twoFactorAuthentication":false,"status":"active","userPreferences":{"displayMode":"light"},"hasPermissionOnAllResources":false,"hasPermissionOnAllCredentialSets":false},"mapping":false,"resourceDetails":[]}
opsRampIncidentId ::INC0010194679
UpdateRequest_Response::{"request":{"subject":"Manage Engine Incident creation","project":null,"resolution":null,"linked_to_request":null,"mode":null,"lifecycle":null,"is_read":false,"assets":[],"workflow_instance_details":null,"entity_instance_properties":[],"cancellation_requested":false,"is_trashed":false,"has_change_initiated_request":false,"rel":{"fixed_in_releases":null,"caused_by_releases":null},"id":"6321000000602016","assigned_time":null,"group":null,"requester":{"email_id":null,"is_technician":false,"sms_mail":null,"mobile":null,"last_name":null,"user_scope":"internal_user","sms_mail_id":null,"cost_per_hour":null,"site":{"deleted":false,"name":"Base Site","id":"6321000000153001","is_default":true},"phone":null,"employee_id":null,"name":"Pavan Gadi","id":"6321000000602010","photo_url":"https://contacts.zoho.in/file?exp=10&ID=-1&t=user&height=60&width=60","is_vip_user":false,"department":null,"first_name":"Pavan Gadi","job_title":null},"email_to":[],"created_time":{"display_value":"Jun 6, 2024 01:16 PM","value":"1717659971485"},"item":null,"workflow":null,"cancel_flag_comments":null,"level":null,"approval_status":null,"impact":null,"sla":{"name":"Normal SLA","id":"6321000000163168"},"resolved_time":null,"priority":{"color":"#006600","name":"Normal","id":"6321000000004859"},"created_by":{"email_id":"prasanna-kumar.sankar@hpe.com","is_technician":true,"sms_mail":null,"mobile":"","last_name":"Sankar","user_scope":"internal_user","sms_mail_id":null,"cost_per_hour":"0","site":{"deleted":false,"name":"Base Site","id":"6321000000153001","is_default":true},"phone":"","employee_id":"100200","name":"Prasanna Kumar","id":"6321000000594011","photo_url":"https://contacts.zoho.in/file?exp=10&ID=60029897160&t=user&height=60&width=60","is_vip_user":false,"department":null,"first_name":"Prasanna Kumar","job_title":null},"tags":[],"first_response_due_by_time":null,"is_escalated":false,"last_updated_time":{"display_value":"Jun 14, 2024 07:04 PM","value":"1718372057178"},"has_notes":false,"udf_fields":{"udf_char2":"INC0010194679"},"impact_details":"Manage Engine Incident creation","subcategory":null,"deleted_time":null,"email_cc":[],"status":{"in_progress":true,"internal_name":"Open","stop_timer":false,"color":"#0066ff","name":"Open","id":"6321000000004865"},"template":{"is_service_template":false,"inactive":false,"name":"Default Request","id":"6321000000004933"},"email_ids_to_notify":[],"attachments":[],"request_type":null,"completed_by_denial":false,"display_id":"2","time_elapsed":"0","notification_status":null,"description":"Manage Engine Incident creation","responded_time":null,"is_service_request":false,"urgency":null,"has_request_initiated_change":false,"request_template_task_ids":[],"department":null,"is_reopened":false,"has_draft":false,"has_attachments":false,"has_linked_requests":false,"message_id":null,"is_overdue":true,"technician":null,"has_problem":false,"due_by_time":{"display_value":"Jun 6, 2024 05:16 PM","value":"1717674371485"},"is_fcr":false,"has_project":false,"site":{"deleted":false,"name":"Base Site","id":"6321000000153001","is_default":true},"is_first_response_overdue":false,"completed_time":null,"unreplied_count":0,"email_bcc":[],"category":null,"maintenance":null},"response_status":{"status_code":2000,"status":"success"}}
opsRampIncidentId ::INC0010194679
Update Incident Function
- Click Admin (gear icon) at the top-right corner of the screen.
- Under Developer Space, click Custom Functions. The Custom Functions screen is displayed.
- Click the Request dropdown and select Select Trigger (or) Life Cycle (or) Timer Actions.
- Click New custom function button.
- Custom Function Name: Enter the Custom Function Name.
Example: OpsRamp Update Function. - Description: Enter the description.
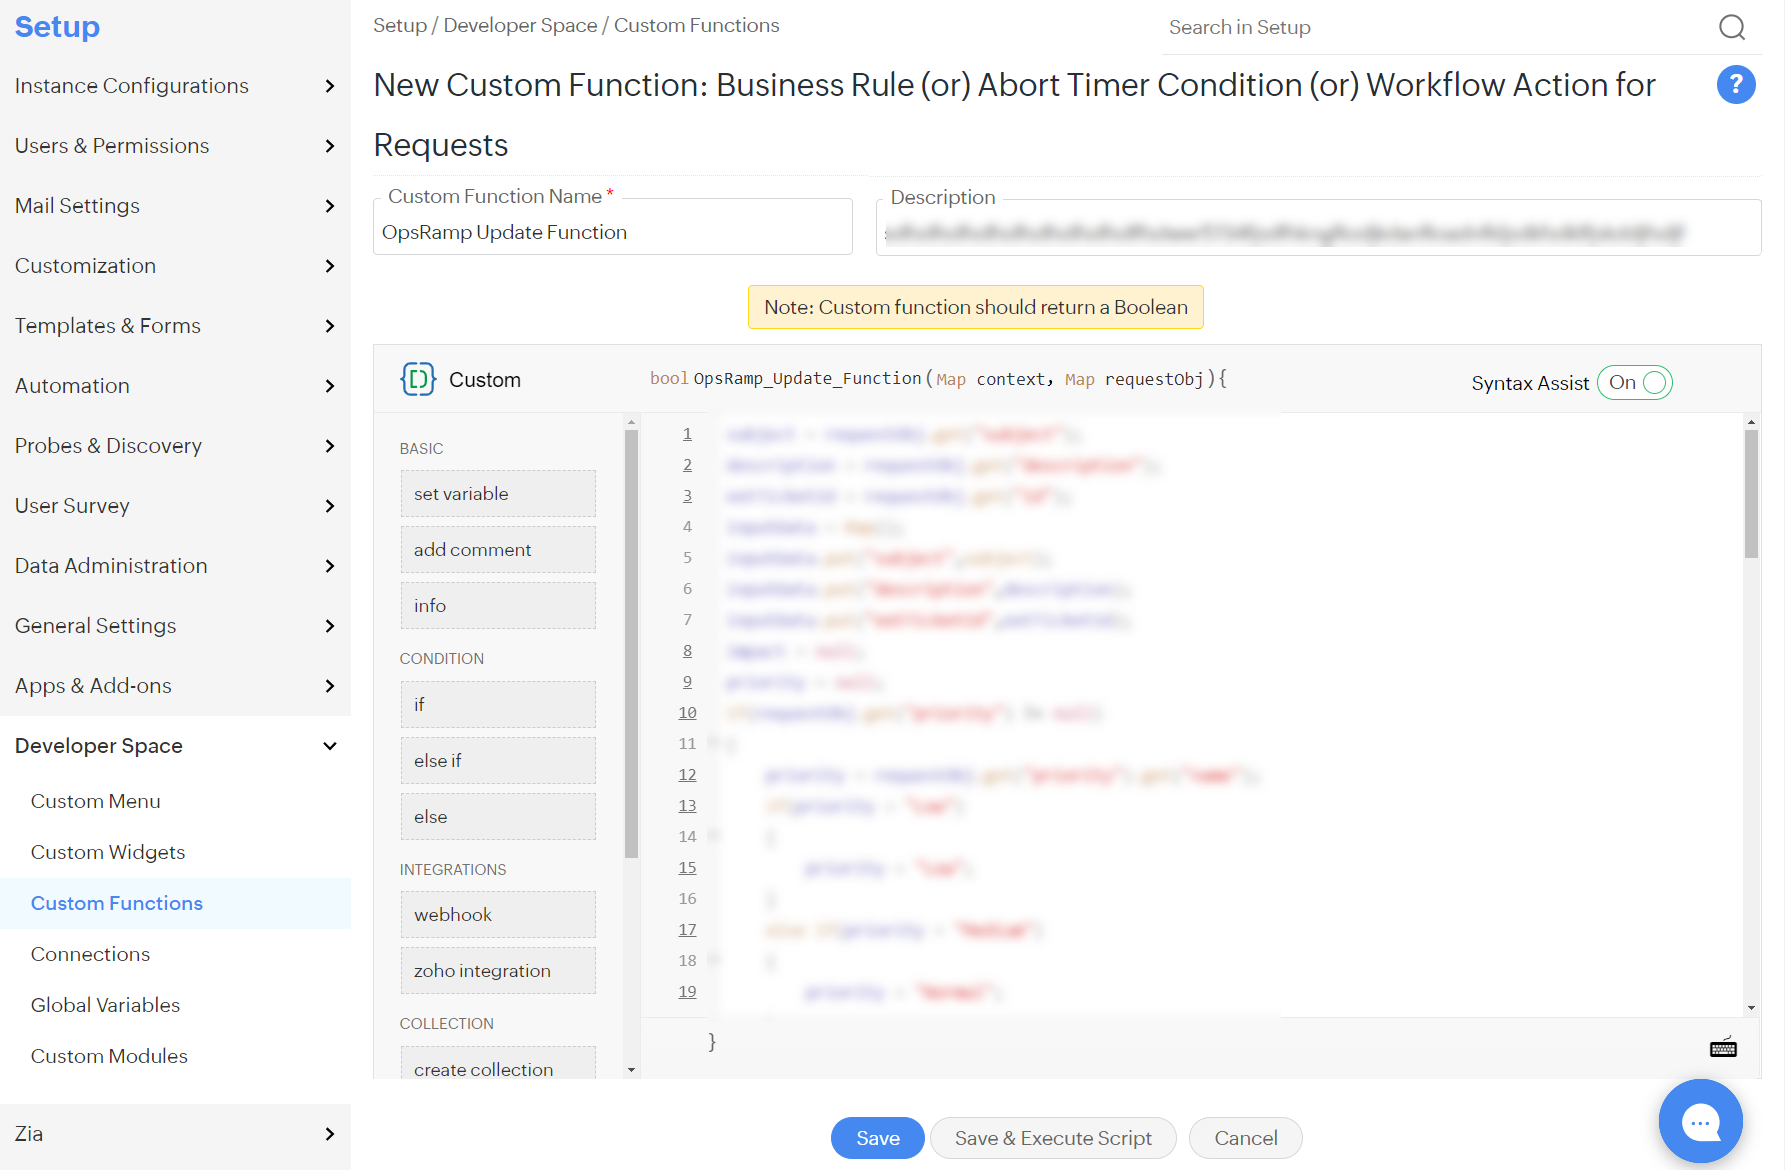
- Provide the script given below in Custom Function field:

Script
subject = requestObj.get("subject");
description = requestObj.get("description");
extTicketId = requestObj.get("id");
inputData = Map();
inputData.put("subject",subject);
inputData.put("description",description);
inputData.put("extTicketId",extTicketId);
impact = null;
priority = null;
if(requestObj.get("priority") != null)
{
  priority = requestObj.get("priority").get("name");
  if(priority = "Low")
  {
    priority = "Low";
  }
  else if(priority = "Medium")
  {
    priority = "Normal";
  }
  else if(priority = "Normal")
  {
    priority = "High";
  }
  else if(priority = "High")
  {
    priority = "Urgent";
  }
  inputData.put("priority",priority);
}
status = null;
if(requestObj.get("status") != null)
{
  status = requestObj.get("status").get("name");
  if(status = "Open")
  {
    status = "Open";
  }
  else if(status = "Resolved")
  {
    status = "Resolved";
  }
  else if(status = "Closed")
  {
    status = "Closed";
  }
  else if(status = "onhold")
  {
    status = "On Hold";
  }
  inputData.put("status",status);
}
urgency = null;
if(requestObj.get("urgency") != null)
{
  urgencyMap = Map();
  urgency = requestObj.get("urgency").get("name");
  urgencyMap.put("name",urgency);
  inputData.put("urgency",urgencyMap);
}
impact = null;
if(requestObj.get("impact") != null)
{
  impactMap = Map();
  impact = requestObj.get("impact").get("name");
  impactMap.put("name",impact);
  inputData.put("businessImpact",impactMap);
}
info "Request : " + inputData;
opsRampIncidentId = requestObj.get("udf_fields").get("udf_char2");
info "meSdpId ::" + opsRampIncidentId;
info "opsRampIncidentId ::" + extTicketId;
headerData = Map();
//headerData.put("Authorization","Bearer e3ab58a9-e83d-4c16-bc38-e83e46958976");
headerData.put("Content-Type","application/json");
createInOpsRamp = invokeurl
[
  url:"https://integration.int-app.opsramp.net/api/v2/tenants/e3093dbb-392c-456d-b4ef-aa8b14a3ba49/incidents/" + opsRampIncidentId
  type :POST
  parameters:inputData.toString()
  headers:headerData
  connection:"opsramp"
];
info "Response : " + createInOpsRamp;
opsRampIncidentId = createInOpsRamp.get("id");
info "opsRampIncidentId ::" + opsRampIncidentId;
- There are some fields in the script which can be modified accordingly.
- Change tenantId in the URL:
- URL:
https://{domain}/api/v2/tenants/{tenantId}/incidents/+opsRampIncidentId - Change the tenantId as per the integration installed in OpsRamp.
- URL:
- Change connection name:
- Connection: “opsramp”
- Enter the Connection Name as mentioned in Create Connection.
- Change tenantId in the URL:
Click Save & Execute Script to test the custom function. The Test Execute window is displayed.
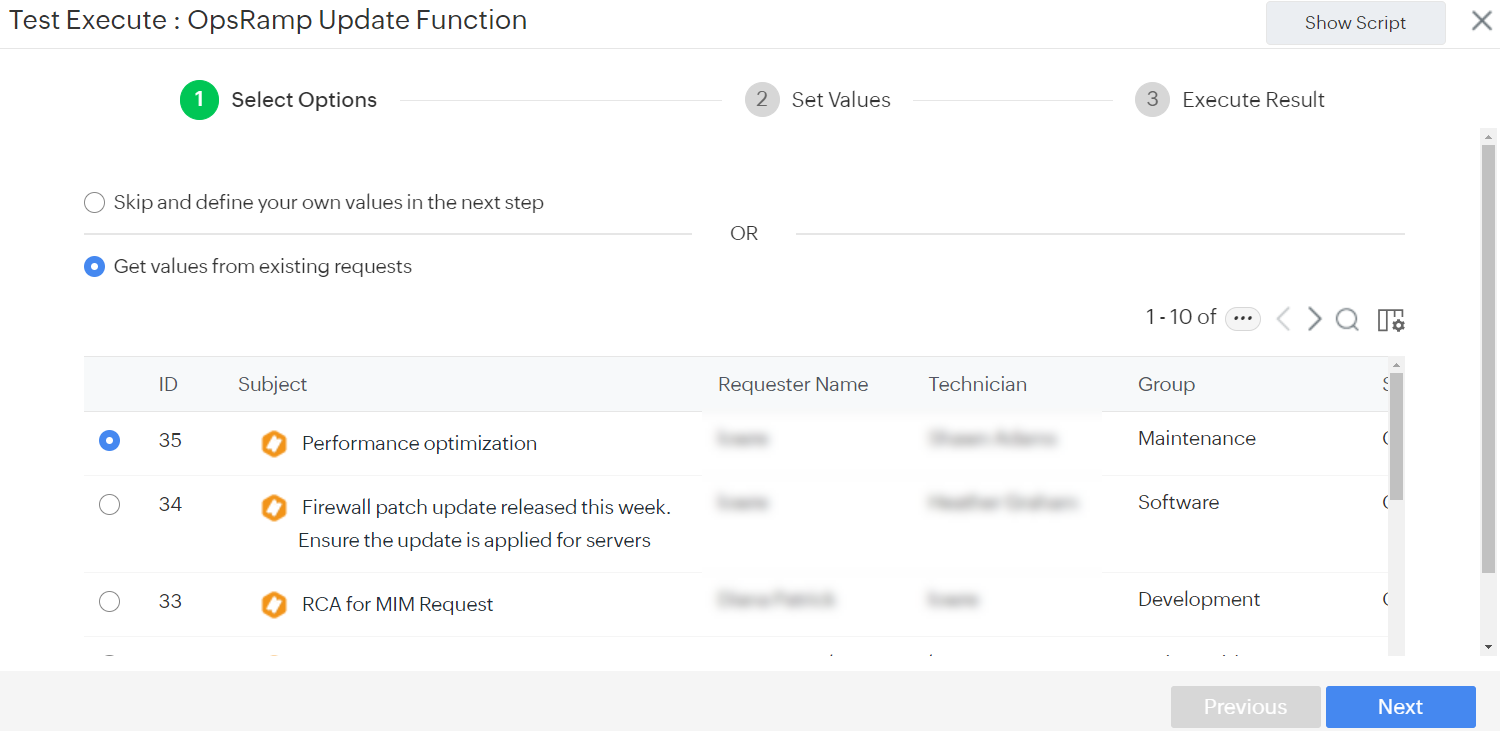
Select the Get values from existing requests option.
Select one of the request radio button.
Click Next. The Set Values screen is displayed.
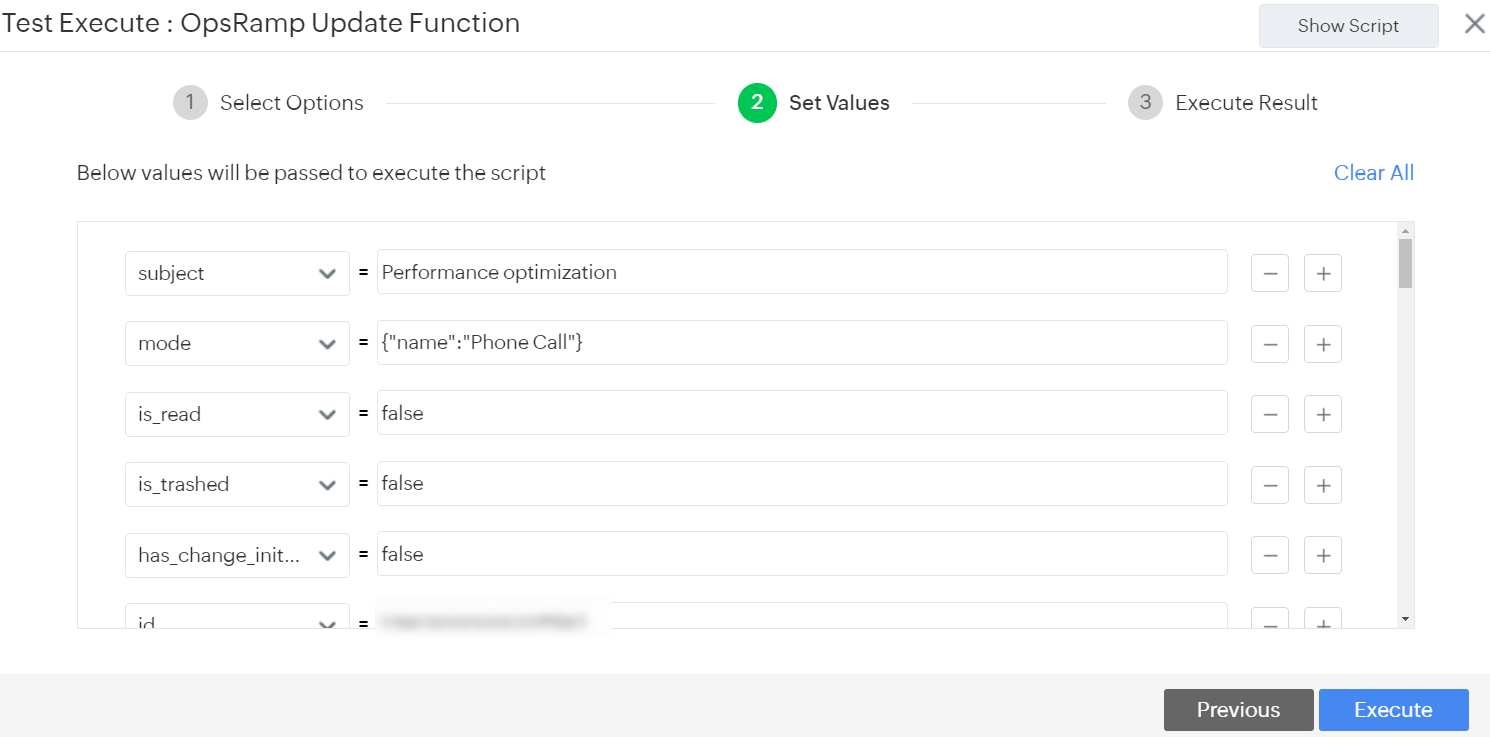
Click Execute.
Once it reaches the OpsRamp Incident API using the access token generated from the connection, the below screen is displayed:
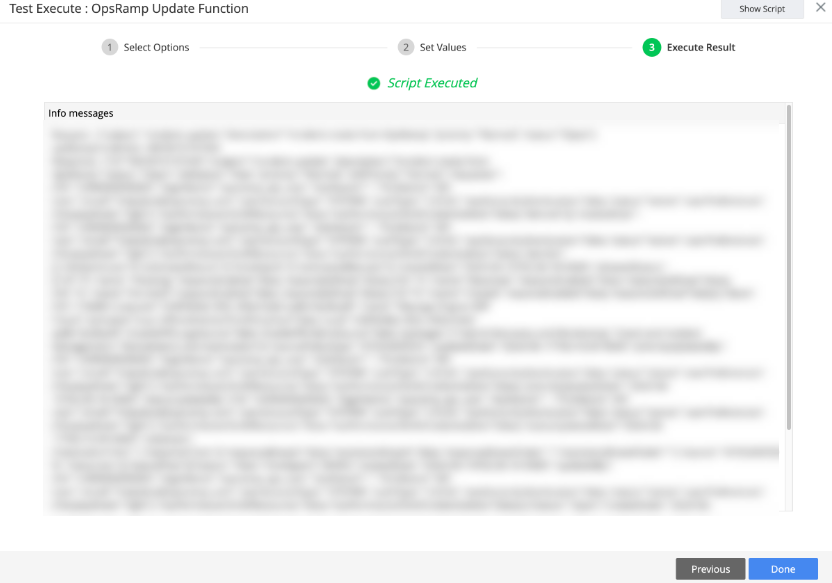
Sample Update incident custom function script response:


Update Incident Response
Request : {"subject":"Incident Update","description":"Incident creation","priority":"Urgent","status":"Open"}
opsRampIncidentId ::INC0010194669
Response : {"id":"INC0010194669","subject":"Incident Update","description":"Incident creation","status":"Open","oldStatus":"New","priority":"Urgent","oldPriority":"Urgent","requester":{"id":"USR0000000002","loginName":"opsramp_api_user","lastName":" ","firstName":"API User","email":"helpdesk@opsramp.com","userAccountType":"SYSTEM","authType":"LOCAL","twoFactorAuthentication":false,"status":"active","userPreferences":{"displayMode":"light"},"hasPermissionOnAllResources":false,"hasPermissionOnAllCredentialSets":false},"devices":[],"createdUser":{"id":"USR0000000002","loginName":"opsramp_api_user","lastName":" ","firstName":"API User","email":"helpdesk@opsramp.com","userAccountType":"SYSTEM","authType":"LOCAL","twoFactorAuthentication":false,"status":"active","userPreferences":{"displayMode":"light"},"hasPermissionOnAllResources":false,"hasPermissionOnAllCredentialSets":false},"alertIds":[],"reOpenCount":0,"estimatedHours":0,"timeSpent":0,"estimatedMinutes":0,"createdDate":"2024-06-14T13:31:00+0000","allowedStatus":[{"id":"3","name":"Pending","reasonsEnabled":false,"reasonsDefined":false},{"id":"4","name":"Resolved","reasonsEnabled":false,"reasonsDefined":false},{"id":"6","name":"On Hold","reasonsEnabled":false,"reasonsDefined":false},{"id":"5","name":"Closed","reasonsEnabled":false,"reasonsDefined":false}],"client":{"id":174489,"uniqueId":"e3093dbb-392c-456d-b4ef-aa8b14a3ba49","name":"Manage Engine SDP Cloud","activated":true,"offlineAlertstoThirdPartyTool":false,"uuid":"e3093dbb-392c-456d-b4ef-aa8b14a3ba49","enablePRCLogsSource":false,"enablePRCAlertsSource":false,"packages":["Hybrid Discovery and Monitoring","Event and Incident Management","Remediation and Automation"]},"sourcePolicyType":"INTEGRATION","updatedDate":"2024-06-14T13:41:12+0000","priorityUpdatedBy":{"id":"USR0000000002","loginName":"opsramp_api_user","lastName":" ","firstName":"API User","email":"helpdesk@opsramp.com","userAccountType":"SYSTEM","authType":"LOCAL","twoFactorAuthentication":false,"status":"active","userPreferences":{"displayMode":"light"},"hasPermissionOnAllResources":false,"hasPermissionOnAllCredentialSets":false},"priorityUpdatedDate":"2024-06-14T13:31:00+0000","statusUpdatedBy":{"id":"USR0000000002","loginName":"opsramp_api_user","lastName":" ","firstName":"API User","email":"helpdesk@opsramp.com","userAccountType":"SYSTEM","authType":"LOCAL","twoFactorAuthentication":false,"status":"active","userPreferences":{"displayMode":"light"},"hasPermissionOnAllResources":false,"hasPermissionOnAllCredentialSets":false},"statusUpdatedDate":"2024-06-14T13:38:32+0000","slaDetails":{"resolutionTime":162,"responseTime":0,"responseBreach":false,"resolutionBreach":false,"responseBreachDate":"","resolutionBreachDate":""},"source":"INTEGRATION","resources":[],"statusFlow":[{"status":"New","timeSpent":452,"createdDate":"2024-06-14T13:31:00+0000","updatedBy":{"id":"USR0000000002","loginName":"opsramp_api_user","lastName":" ","firstName":"API User","email":"helpdesk@opsramp.com","userAccountType":"SYSTEM","authType":"LOCAL","twoFactorAuthentication":false,"status":"active","userPreferences":{"displayMode":"light"},"hasPermissionOnAllResources":false,"hasPermissionOnAllCredentialSets":false}},{"status":"Open","createdDate":"2024-06-14T13:38:32+0000","updatedBy":{"id":"USR0000000002","loginName":"opsramp_api_user","lastName":" ","firstName":"API User","email":"helpdesk@opsramp.com","userAccountType":"SYSTEM","authType":"LOCAL","twoFactorAuthentication":false,"status":"active","userPreferences":{"displayMode":"light"},"hasPermissionOnAllResources":false,"hasPermissionOnAllCredentialSets":false}}],"originalTicketId":"","lastUpdatedBy":{"id":"USR0000000002","loginName":"opsramp_api_user","lastName":" ","firstName":"API User","email":"helpdesk@opsramp.com","userAccountType":"SYSTEM","authType":"LOCAL","twoFactorAuthentication":false,"status":"active","userPreferences":{"displayMode":"light"},"hasPermissionOnAllResources":false,"hasPermissionOnAllCredentialSets":false},"mapping":false,"resourceDetails":[]}
opsRampIncidentId ::INC0010194669
Configure Custom Triggers
The Custom Triggers feature, as the name indicates, helps customize automatic workflows for different types of user requests. An action is triggered for new requests that match the conditions you specify. These conditions refer to the values that certain fields in the request must hold, and are checked when a request is created, updated, or created and updated.
Under Custom Triggers, do the following:
Create Custom Trigger
Follow these steps to create custom trigger:
Click Admin (gear icon) at the top-right corner of the screen.
Under Automation, click Triggers. The Triggers screen is displayed.
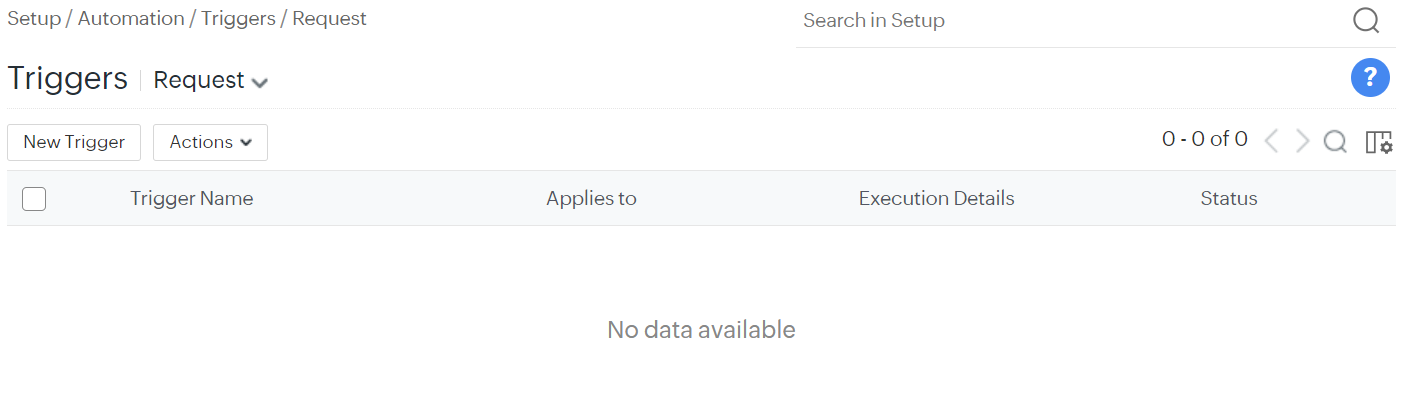
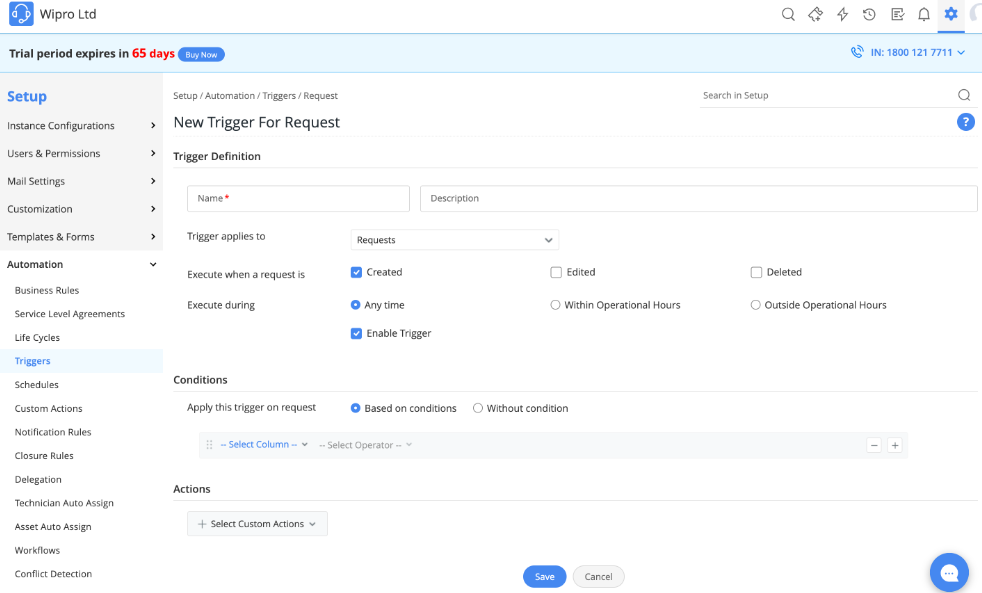
Click New Trigger. The New Trigger For Request screen is displayed.
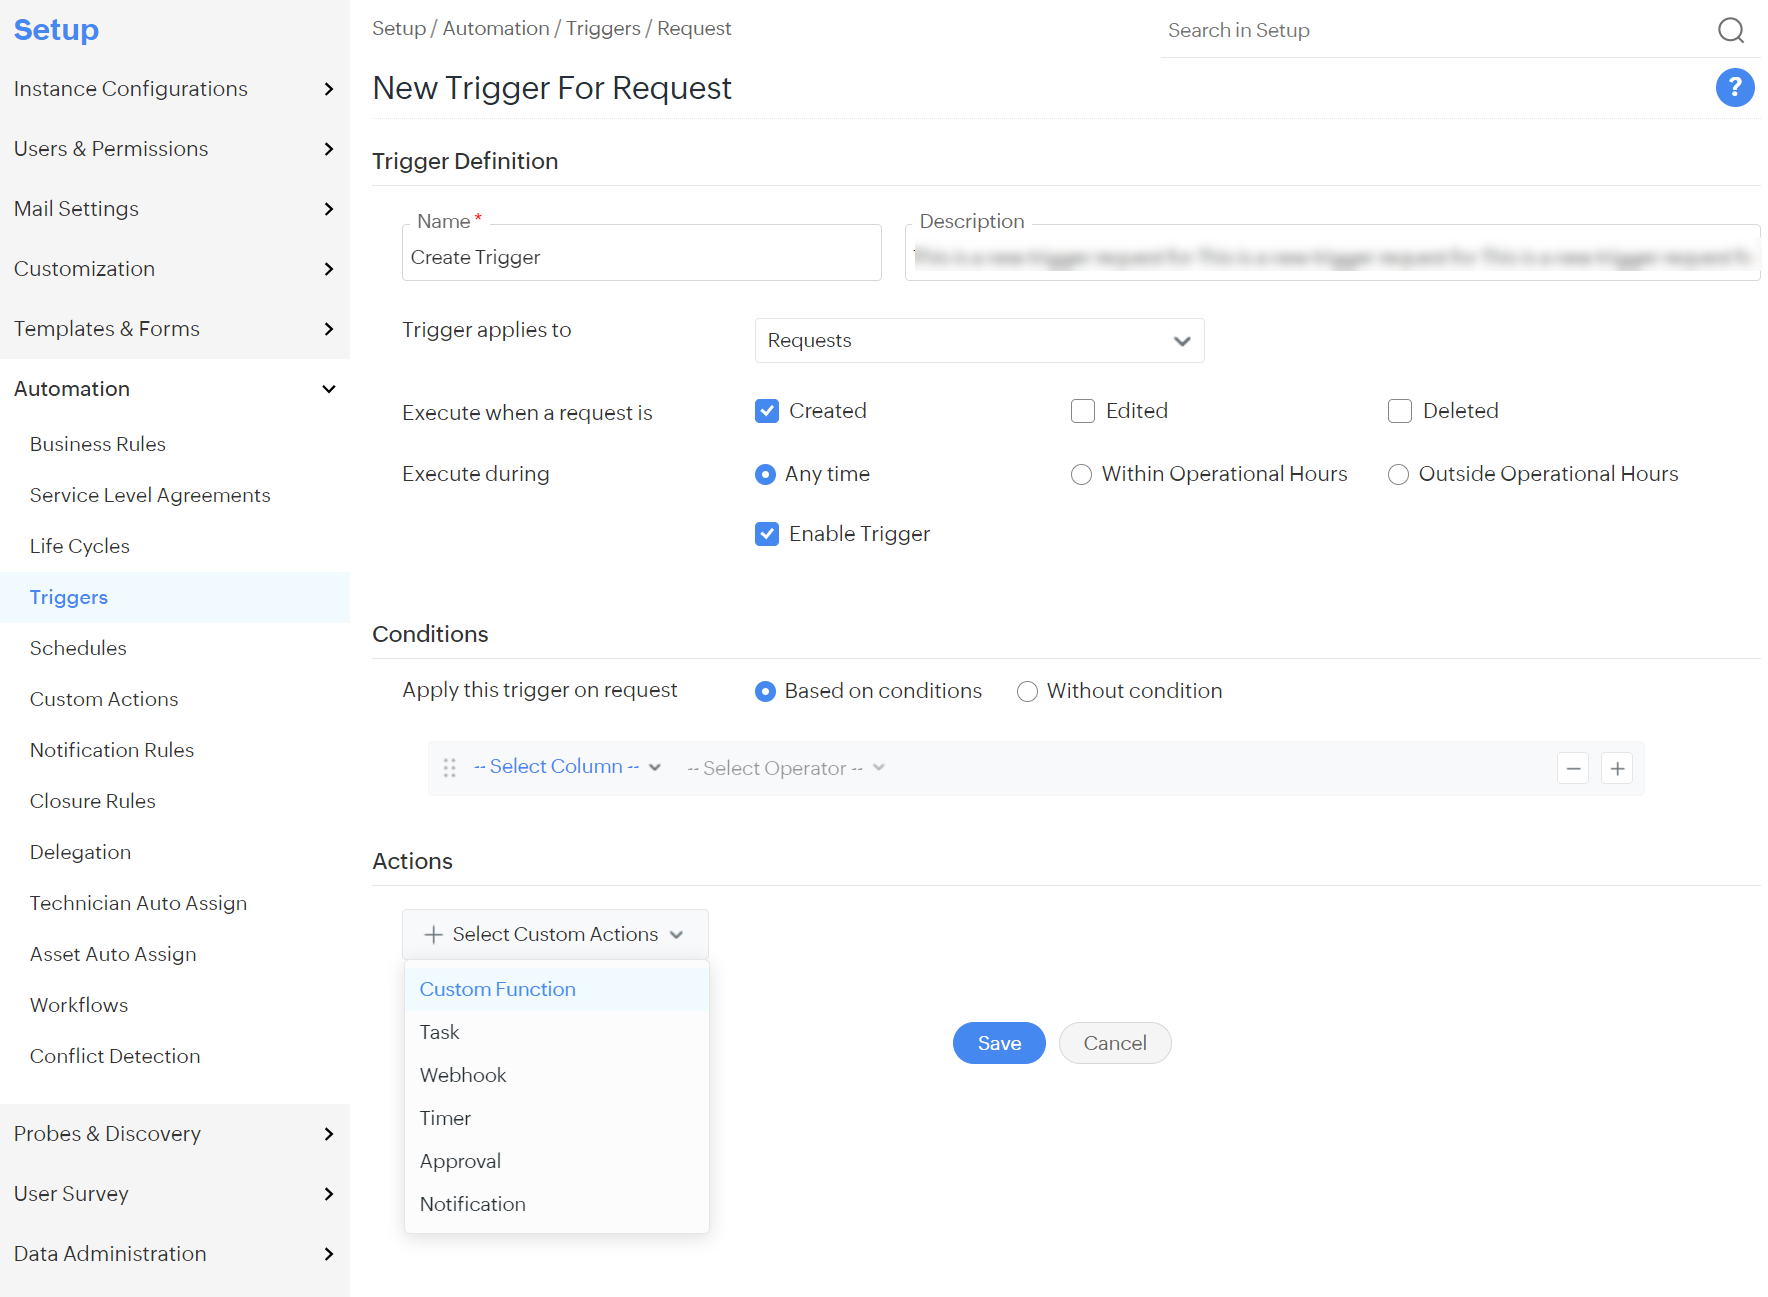
Enter the following information:
- Trigger Definition
- Name: Enter a name.
Example: Create Trigger. - Description: Enter a description.
- Trigger applies to: Select Requests from the dropdown.
- Execute when a request is: Select Created checkbox.
- Execute during: Select Any time radiobutton.
- Select Enable Trigger checkbox.
- Name: Enter a name.
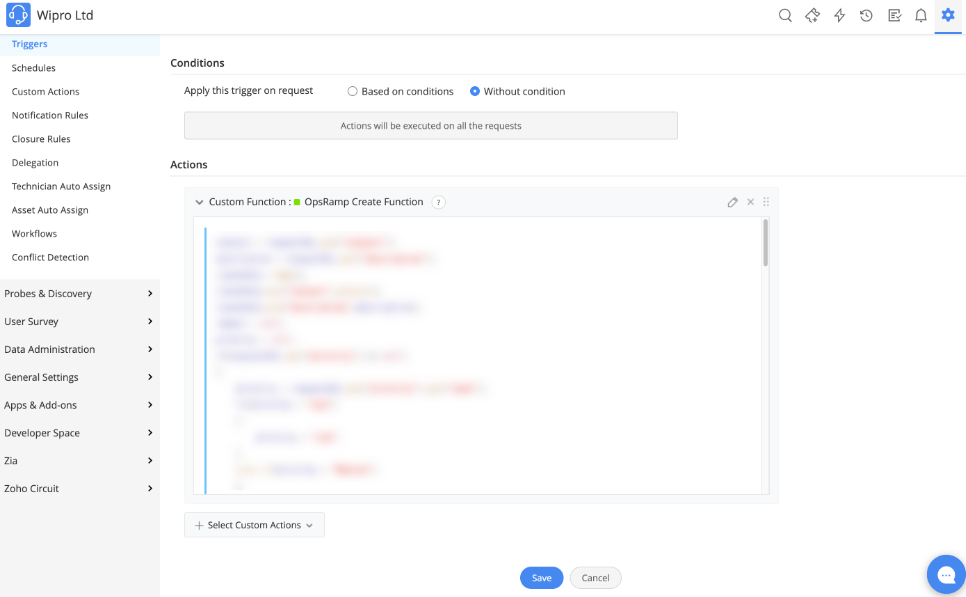
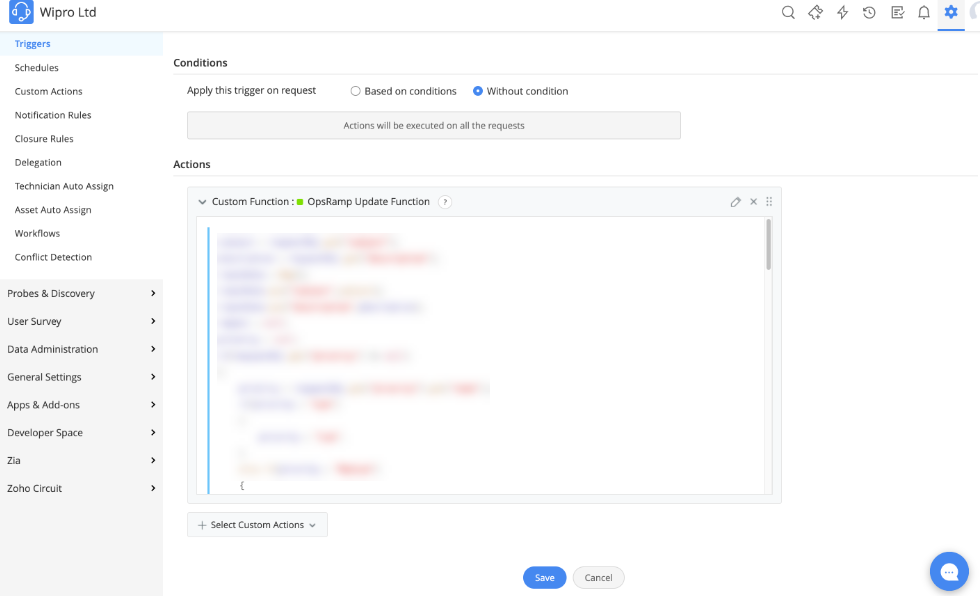
- Conditions
- Apply this trigger on request
- Based on conditions: Trigger will be applied as per the conditions mentioned.
- Without condition: Trigger will be applied on all the requests.
- Apply this trigger on request
- Actions
- Click +Select Custom Actions and select Custom Function. The Select a custom function action window is displayed.
- Select the Custom Function which you created previously in Create Incident Function.
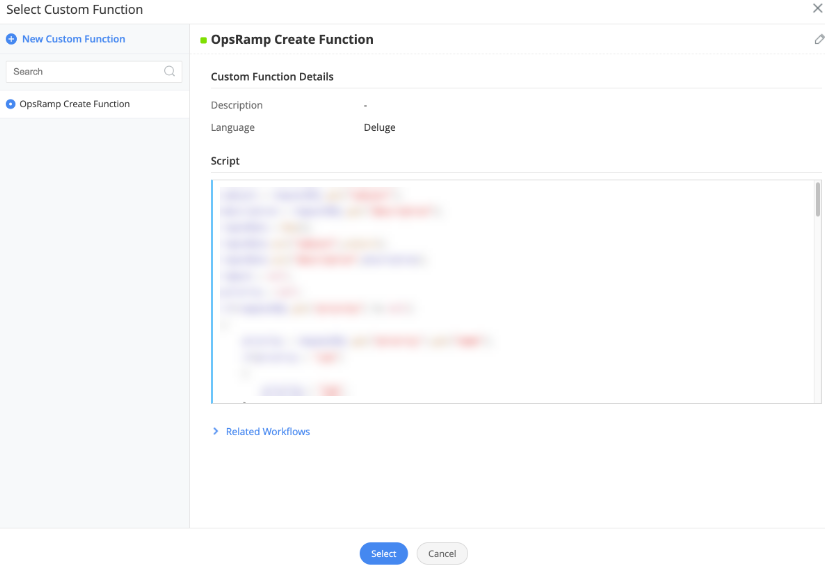
- Click Select.
- Click Save.
- Select the Custom Function which you created previously in Create Incident Function.
- Click +Select Custom Actions and select Custom Function. The Select a custom function action window is displayed.
- Trigger Definition


Update Custom Trigger
Follow these steps to update custom trigger:
Click Admin (gear icon) at the top-right corner of the screen.
Under Automation, click Triggers. The Triggers screen is displayed.
Click New Trigger. The New Trigger For Request screen is displayed.
Enter the following information:
- Trigger Definition
- Name: Enter a name.
Example: Update Trigger. - Description: Enter a description.
- Trigger applies to: Select Requests from the dropdown.
- Execute when a request is: Select Edited checkbox.
- Execute during: Select Any time radiobutton.
- Select Enable Trigger checkbox.
- Name: Enter a name.
- Conditions
- Apply this trigger on request
- Based on conditions: Trigger will be applied as per the conditions mentioned.
- Without condition: Trigger will be applied on all the requests.
- Apply this trigger on request
- Actions
- Click +Select Custom Actions and select Custom Function. The Select a custom function action window is displayed.
- Select the Custom Function which you created previously in Update Incident Function.

- Click Select.
- Click Save.
- Select the Custom Function which you created previously in Update Incident Function.
- Click +Select Custom Actions and select Custom Function. The Select a custom function action window is displayed.
- Trigger Definition


