Deploy a Gateway on Azure
Deploy and register the gateway on Azure Cloud environment to monitor and manage your resources.
Prerequisites
Copy the Azure Gateway blob container URI to download the Azure VHD file.
Configure Azure
Perform the following steps to configure Azure:
- Creating resource groups.
- Setting up the gateway with Storage Explorer.
- Creating an image.
- Deploying a virtual machine (VM) using the gateway image
Create resource groups
A resource is a manageable item that is available through Azure. Virtual machines, storage accounts, web apps, databases, and virtual networks are examples of resources.
Create a resource group with a storage account using an Azure account.
Note
Resource groups include resources that you want to manage as a group.To create resource groups, perform the following steps:
- Log into the Azure account where you want to install the gateway.
- Create a resource group for the OpsRamp gateway:
- On the left pane, click Resource groups.
- From the Resource groups screen, click +Add.
- Provide the Resource group name, select the required Resource group location, and click Create.
- Verify that the Resource group has been created.
- Create a storage account within the same resource group:
- On the left pane, click Storage accounts and click +Add.
- Select the resource group that you created for the OpsRamp gateway and click Review + create.

Setup a gateway with Storage Explorer
To set up the OpsRamp gateway using Storage Explorer, perform the following steps:
- Install the Storage Explorer.
- Open Azure Storage Explorer and add the Azure account (the same account that you created in the previous steps).
- Copy the OpsRamp VHD file to the Azure account and do the following:
- Go to the Storage account and select the storage account that was created.
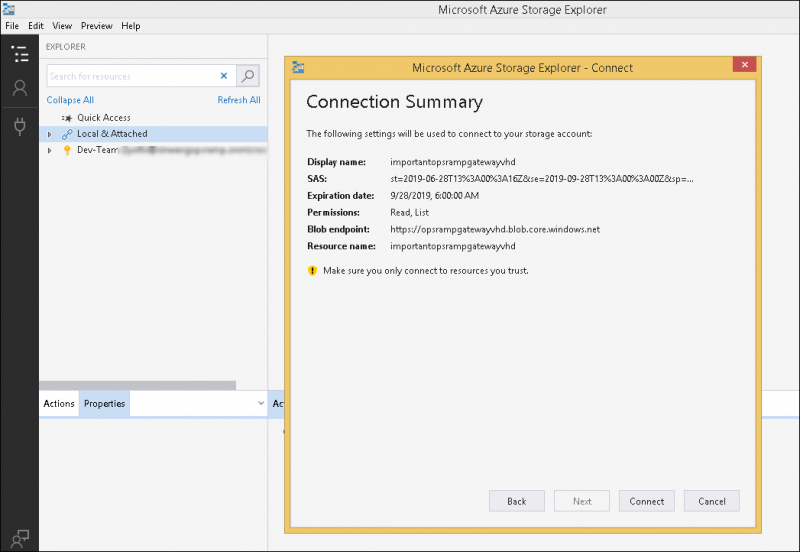
- Click the Connection icon to launch the Connect to Azure Storage screen.
- Select the Use a shared access signature (SAS) URI option and click Next.
- From the Attach with SAS URI screen, enter the Gateway blob container link (provided by OpsRamp support)and click Next.
- Click Connect. The VHD file is downloaded.
- Copy the OpsRamp gateway VHD file from the OpsRamp blob container to the Azure account blob container that you created.
Create an image
Azure allows you to define VM images or use pre-defined images. These images can be used to create one or more VM instances that look alike.
To create a new image for the gateway, perform the following steps:
On the left pane, click +Create a resource.
Enter
Imagein the search bar.Click Create.
From the Create Image screen, provide the following:
- Name: Enter a unique name for the gateway.
- Subscription: Select the account for spinning up the gateway.
- Resource Group: Select the resource created for the gateway.
- Location: Select the location from the drop-down options.
- OS disk: Linux
- Storage Blob: Browse and select the downloaded OpsRamp Gateway VHD file and click Create.
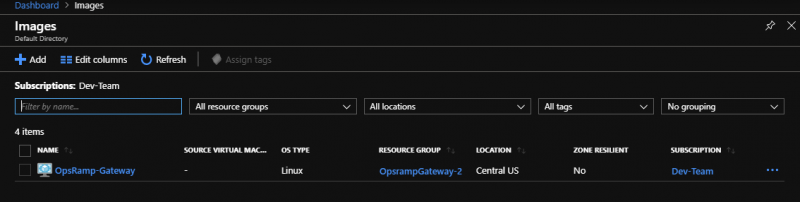
Verify that the new image has been created.
Deploy a VM
To deploy a VM for the gateway using the created image:
- From the Images list, click the name of the image for the VM.
- Click +Create VM, provide the following information and click Next.
- Resource Group: Resources created for the OpsRamp gateway.
- Virtual Machine Name: Unique name for the VM.
- Image: Gateway image that was created.
- Size: Minimum requirement is 2 vCPUs, 4GiB memory.
- Authentication Type: Password or SSH public key.
- On the disk screen, specify
Premium SSDfor the OS disk type and click Next. - Go to NIC network security group > Advanced and ensure that port 22 and port 5480 are allowed on the gateway. These ports are required for accessing the web and serial user interface.
- Click Next.
- (Optional) Configure Advanced and Tags, and click Review + Create.
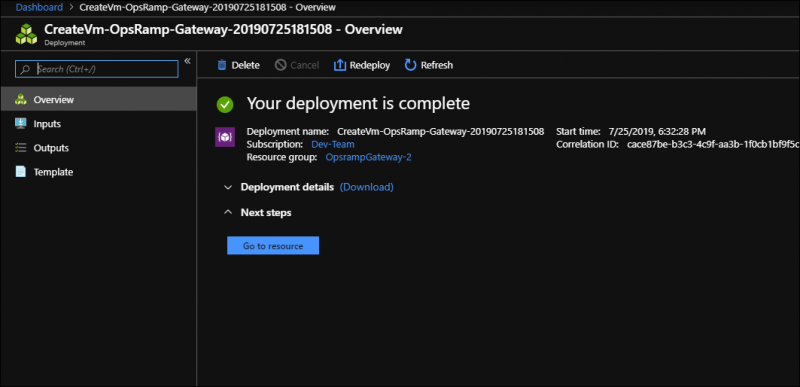
- From the Validation screen, click Create.
Register the Gateway
To register a gateway, the gateway registration has to be configured.
Configure the gateway registration
After creating a management profile, configure the gateway registration using one of the following methods:
- Gateway administration console
- Gateway web user interface
Configuring with the administration console
To configure the gateway using the administration console:
- Log into the gateway VM with the provided username and password.
For default login credentials to log into the administration console, contact OpsRamp Support. - From the left pane, click General.
- Verify that the Registration Status is
Not Registeredand the Tunnel Status isNot Established.Note
During the installation of the OpsRamp gateway, the first screen prompts you to set a hostname for the gateway. If the hostname is not provided, the gateway is identified based on the MAC Address that is displayed across the user interface. - Click Network, select Use Static IP address and then click Save.
- To configure the gateway to use Proxy, use CTRL+P to navigate to Proxy Settings.
By default, Direct connection to the Internet is selected. - Provide the OpsRamp server
(api.opsramp.com)information and enter the activation token. - Click Update Now to register the gateway to OpsRamp.
- Verify that the gateway is registered with OpsRamp.
Configuring with the web user interface
To configure the gateway using the web user interface:
- On the web browser, enter the URL using the following syntax:
https://<enter Gateway IP address>:5480. - From the gateway login screen, provide a default username and password.
- Click Network. If required, clear the Obtain an IP Address from DHCP selection and provide the static address.
- (Optional) Enter VLAN, Static Routing, and Proxy information.
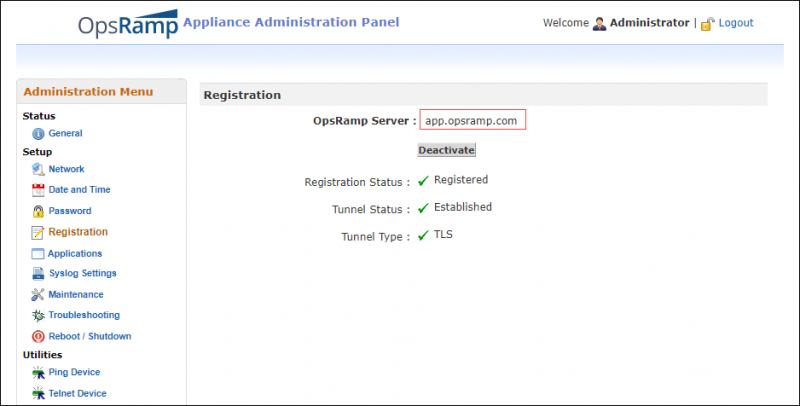
- From the Administration menu, click Registration and provide the activation token.
- Provide the OpsRamp SaaS endpoint details
(app.opsramp.com)and click Activate. - Verify that the Registration Status displays a Registered and Success status.
Activate the Gateway
- Login to the Gateway Administration Web UI using the URL:
https://<Gateway_IP_Address>:5480
(or)
Login to SSH to Gateway CLI with the default credentials:
Note: To get the credentials, login to OpsRamp portal, go to Setup > Downloads > Gateway. - Go to Registration and enter:
- API Server: copy and enter the host url.
- Activation Token: copy and enter the activation token.
- Complete the registration.
- Change the default password.